
Let’s learn how to create clients in Local Service Hero.
There are at least 3 ways you can add new clients to your Local Service Hero account. You can convert leads into clients, manually add clients one by one, or add a lot of clients in bulk using a CSV file.
Click here to read a tutorial on adding clients from a CSV.
In this guide, we’ll show you how to convert leads into clients and how to manually add clients using the New Client form.
1- Converting leads into clients
Local Service Hero allows you to easily convert your leads into clients. This is an easy way to add lots of new clients.
First, you need to open the Leads’ page by going to CRM > Leads > View All.
Once there, you’ll see all your leads displayed on a spreadsheet.
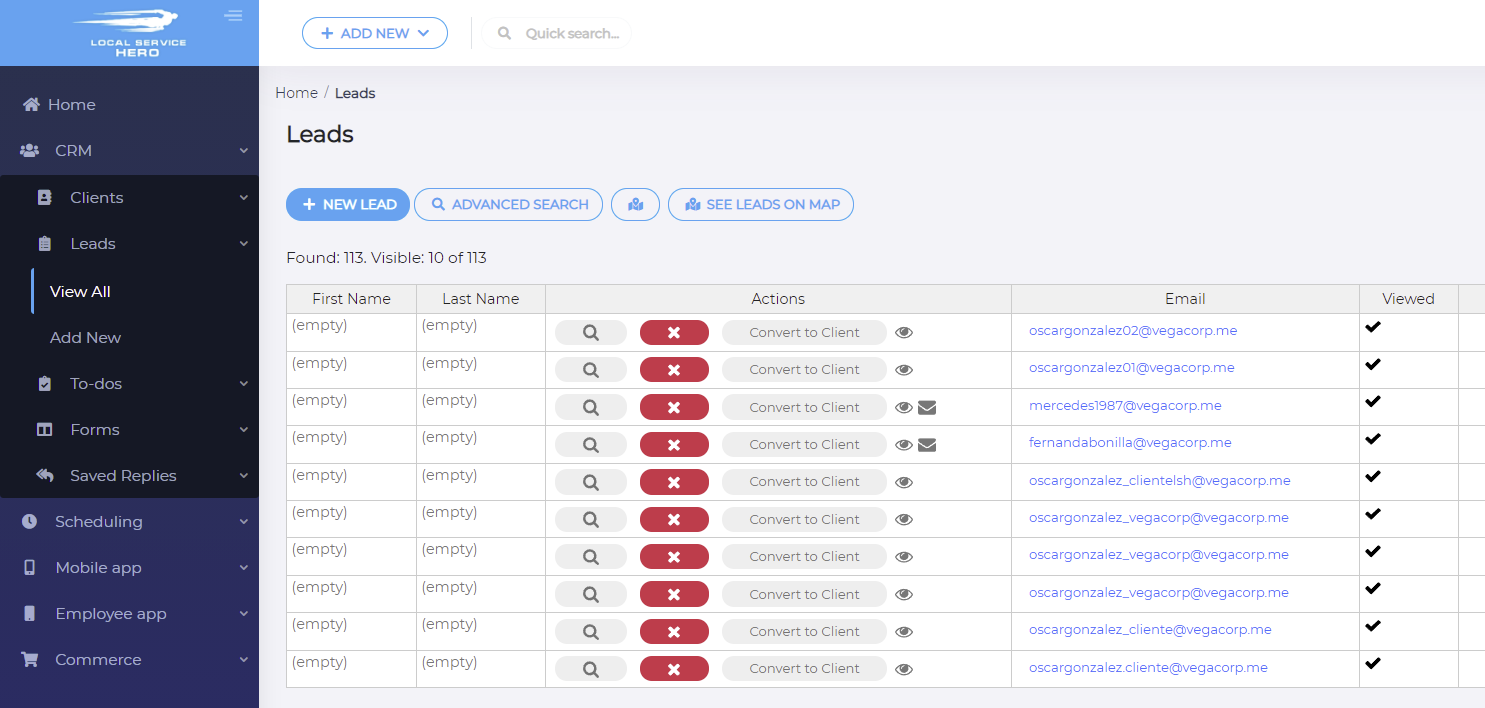
To convert a lead into a client, you just need to use the Actions column and click Convert to Client.
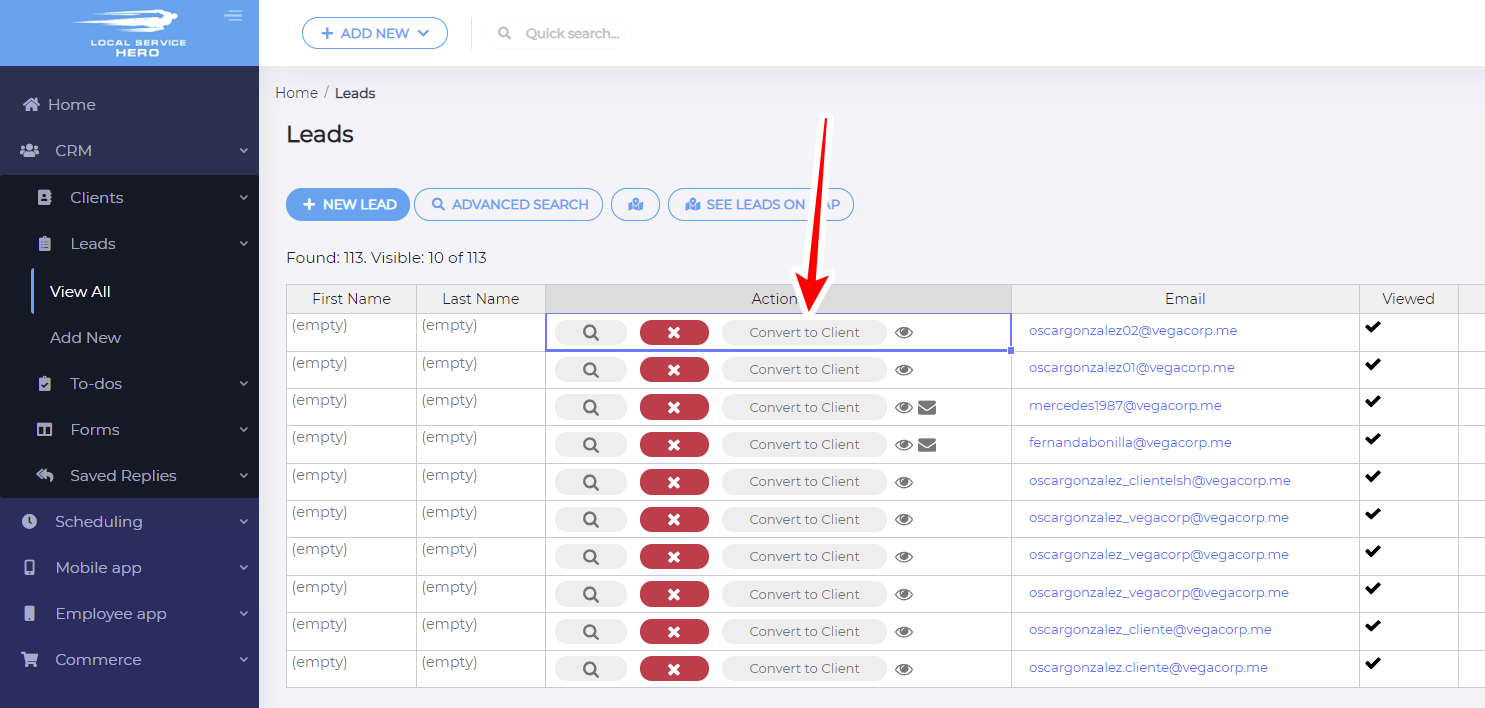
Once you click the Convert to Client button, Local Service Hero will remove the lead from the Leads page and add it to the Clients page.
2- Create clients in Local Service Hero
Local Service Hero also allows you to manually add new clients by following these steps:
First, open the Add New Client for using any of these 3 options:
- Click Add New on the plugin’s toolbar and select Client.
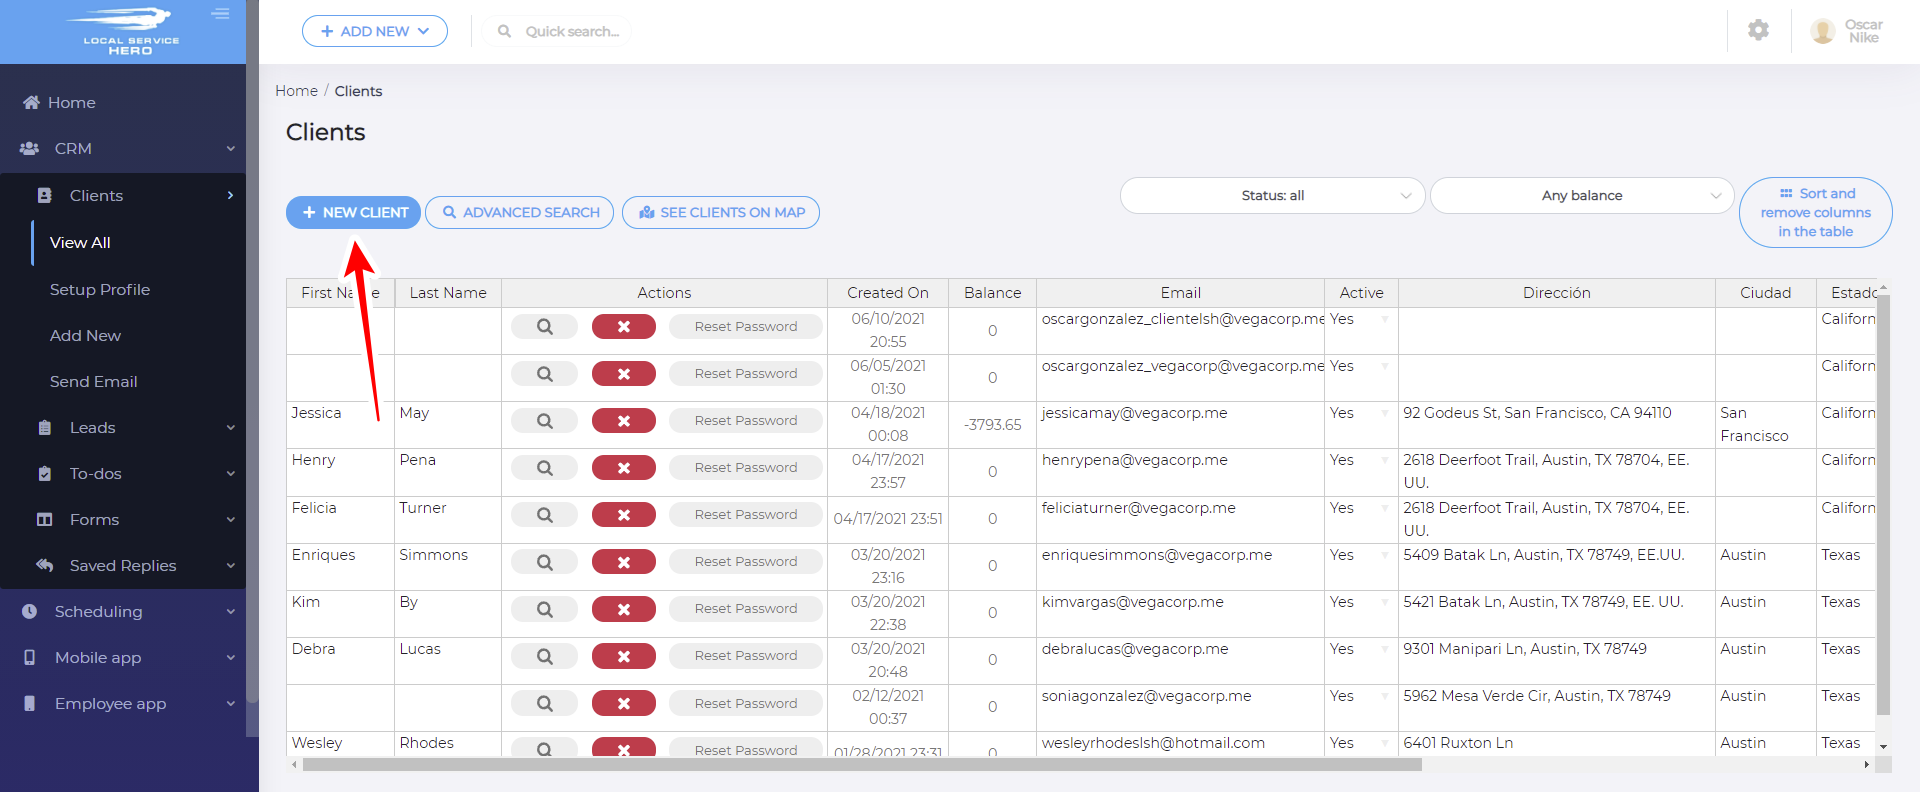
- Go to CRM > Clients > View All and click New Client.
- Go to CRM > Clients > Add New.
Here we’re using the second alternative.
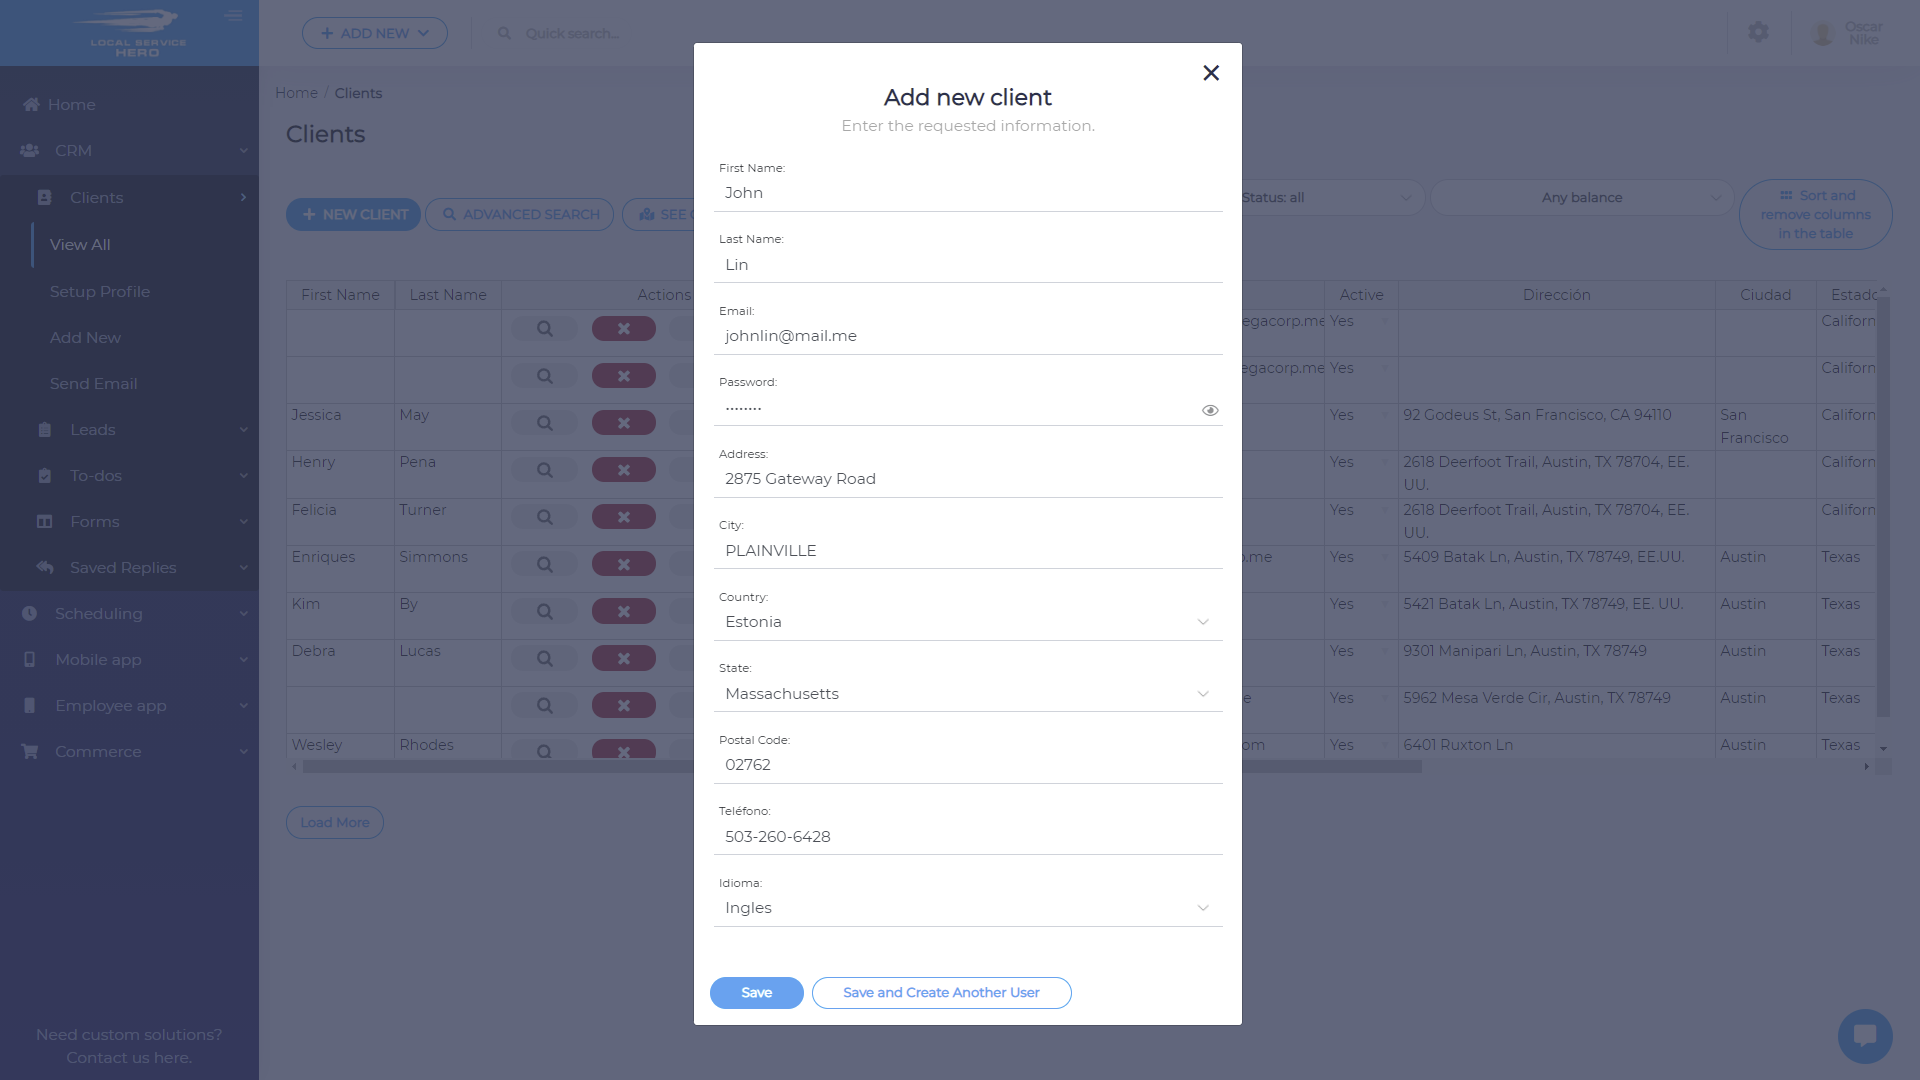
Second, you will see a popup displaying the Add new client form, where you need to add the new client’s information. This is the info you will be required to fill:
- First Name
- Last Name
- Password
- Phone
- Address
- Country
- City
- State
- Postal Code
- Phone
- Language
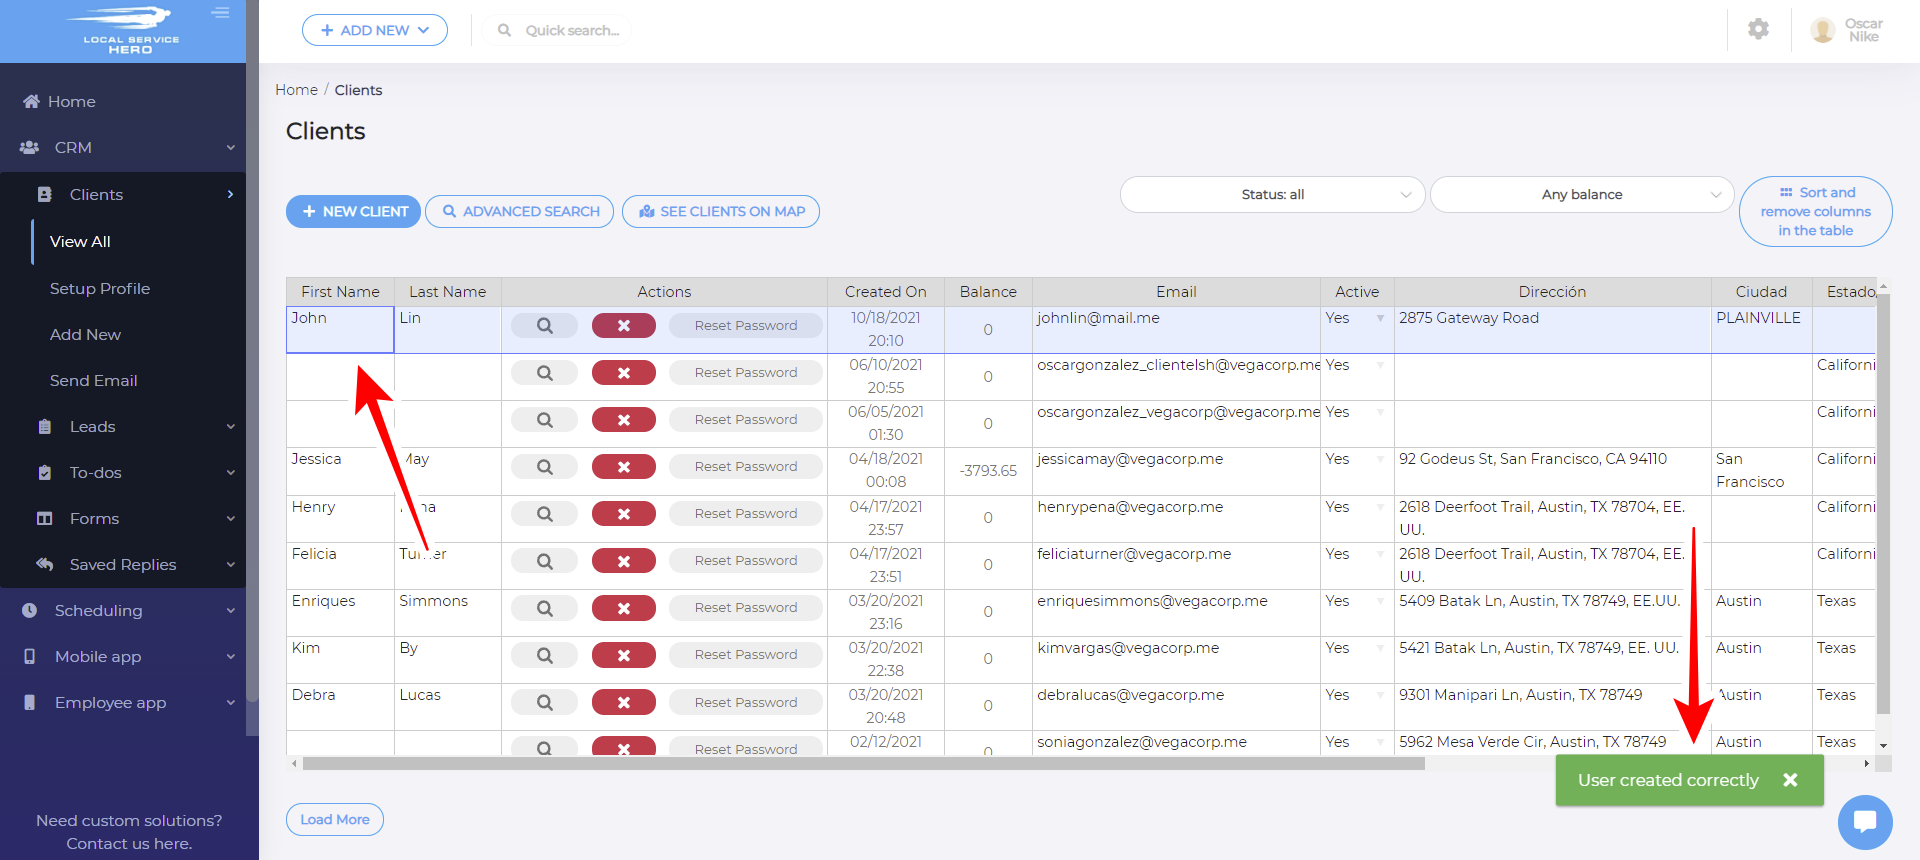
Then, you can click Save or you can Save and Create Another User.
Now, you will see that the new client has been successfully added to the spreadsheet.
Don’t forget there’s a third way to create many clients at once by importing the client profiles from a CSV file into Local Service Hero.


