In this guide, you’ll learn how to manage the customer mobile app settings in Local Service Hero.
You’ll learn how to manage both the main settings and the quick settings of the mobile app for customers.
1- Manage the customer mobile app settings in Local Service Hero
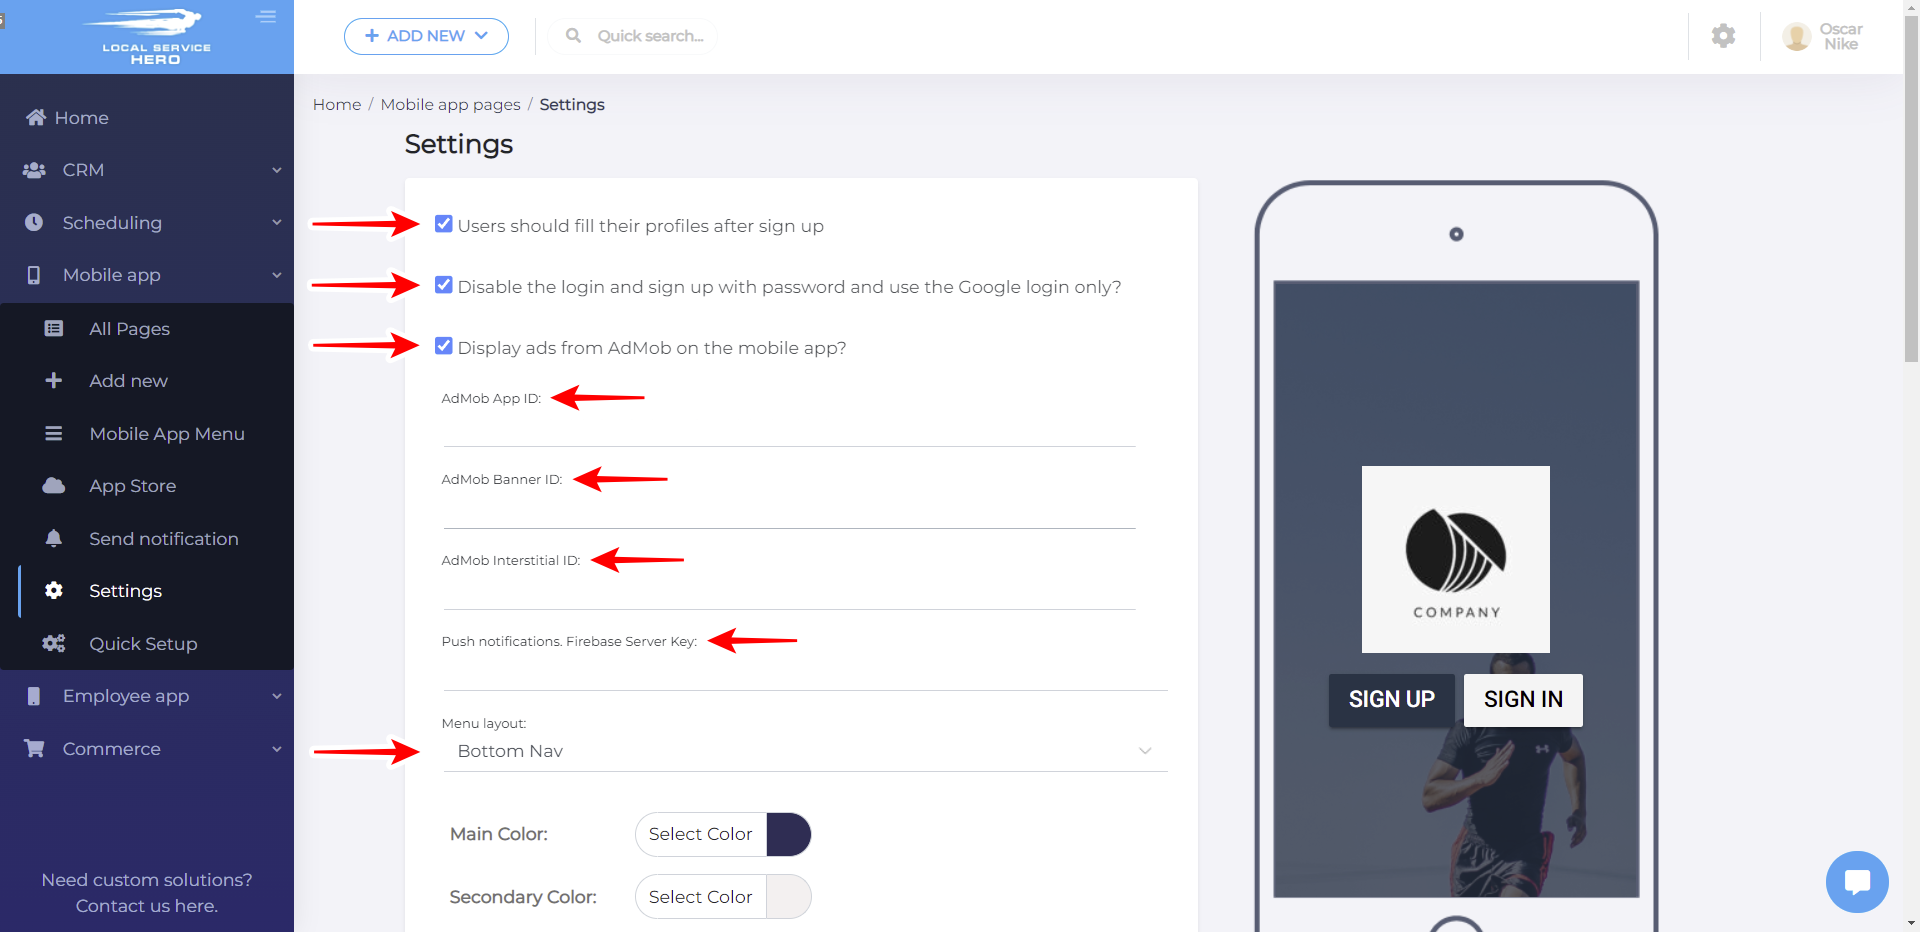
After you sign in to your Local Service Hero dashboard, go to Mobile App > Settings.
Once there, you’ll be able to select the following settings for your mobile app for customers:
- Users should fill their profiles after sign up: Select “Yes” or “No”.
- Disable the login and sign up with password and use Google login only: Select “Yes” or “No”.
- Display ads from AdMob on the mobile app: Select “Yes” or “No”. If you select Yes, you’ll have to add the following keys and IDs:
- AdMob App ID
- AdMob Banner ID
- AdMob Insterstitial ID
- Push notifications. Firebase Server Key
- Menu Layout: You can select “Bottom Nav” or “Sidebar”
Besides, you can select your mobile app’s colors (Main Color, Secondary Color, Menu Link Color, Splash Text Color), and upload your mobile app’s logo.
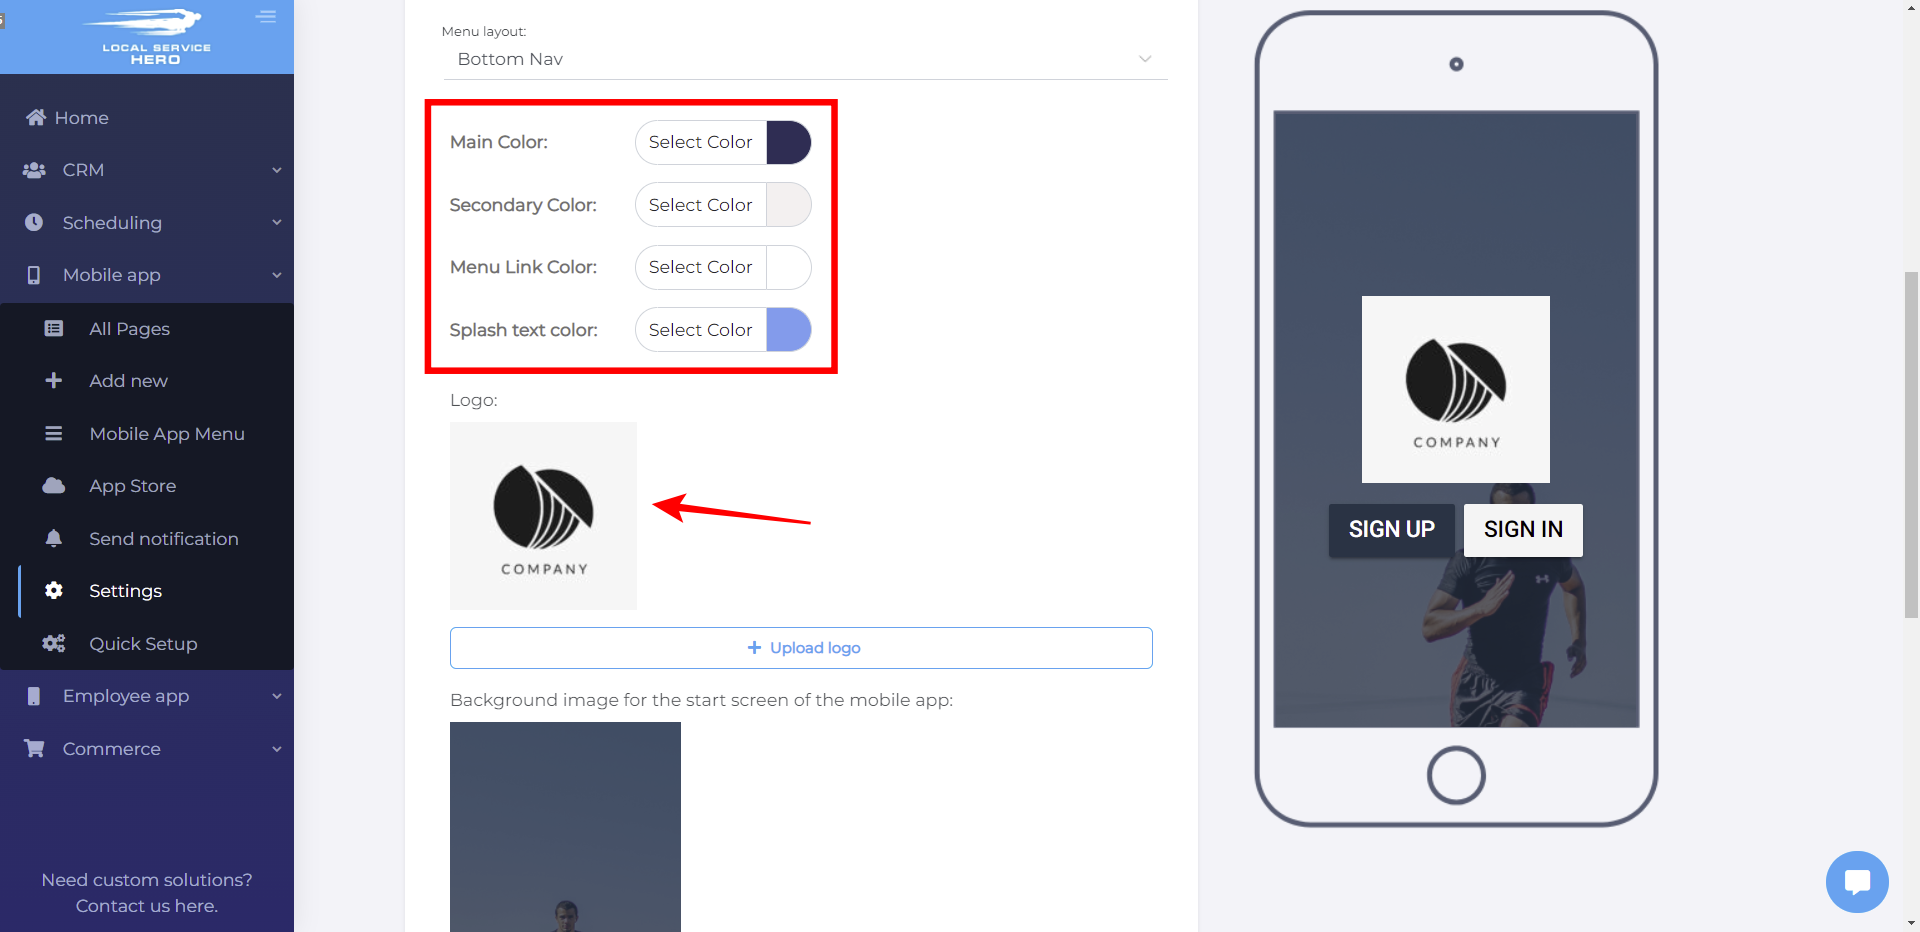
You can also add a background image for the start screen of the mobile app. It should be an image that suits the screen dimensions.
Finally, you can add custom CSS for the customer app.
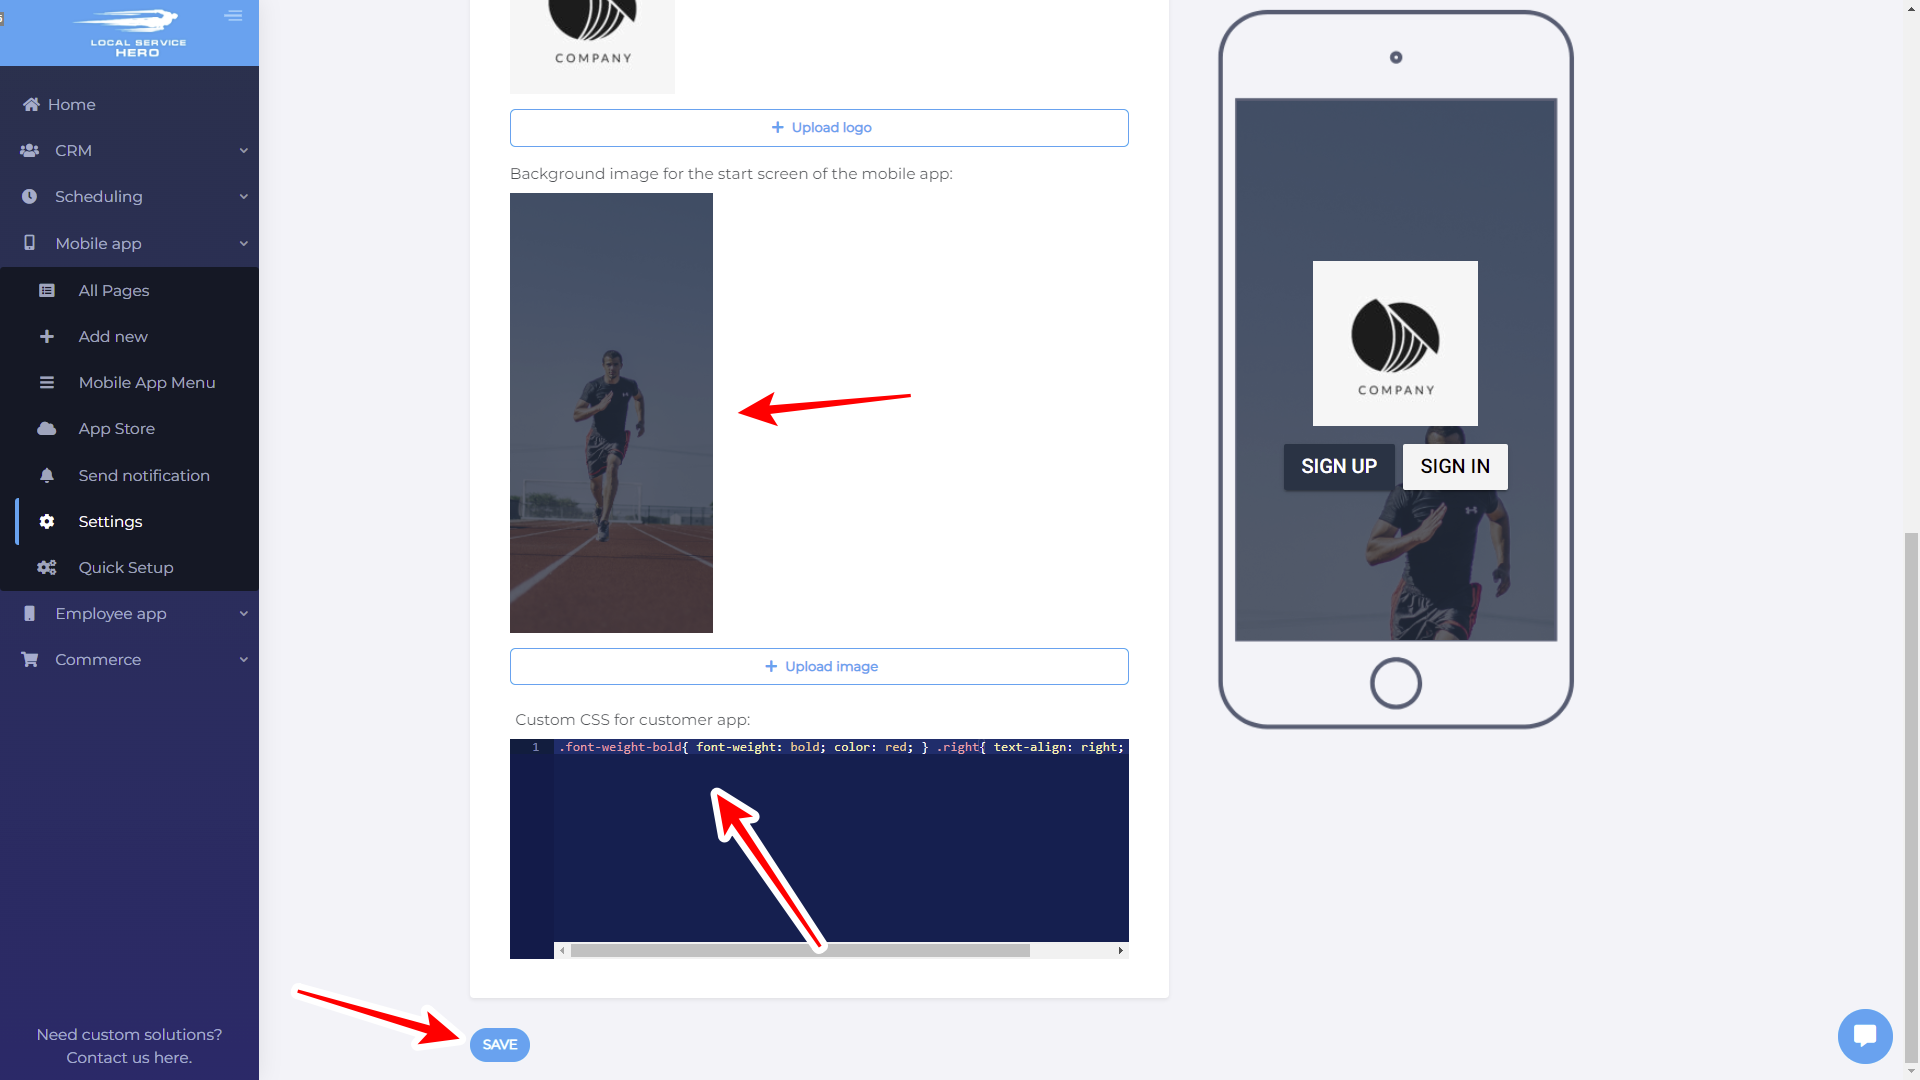
Once you’re done selecting your mobile app for customers’ settings, hit Save to apply the changes.
2- Manage the customer mobile app quick settings in Local Service Hero
Now let’s learn how to manage the mobile app settings in Local Service Hero.
These quick settings allow you to quickly modify some general settings of your customers’ mobile app.
Go to Mobile App > Quick Setup.
- You can start by selecting the mobile app’s colors (Main Color, Secondary Color, Menu Link Color).
- Besides, you can upload a logo for your mobile app.
- Allow users to upload photos: Select “Yes” or “No”.
- Allow users to pay in the mobile app: Select “Yes” or “No”.
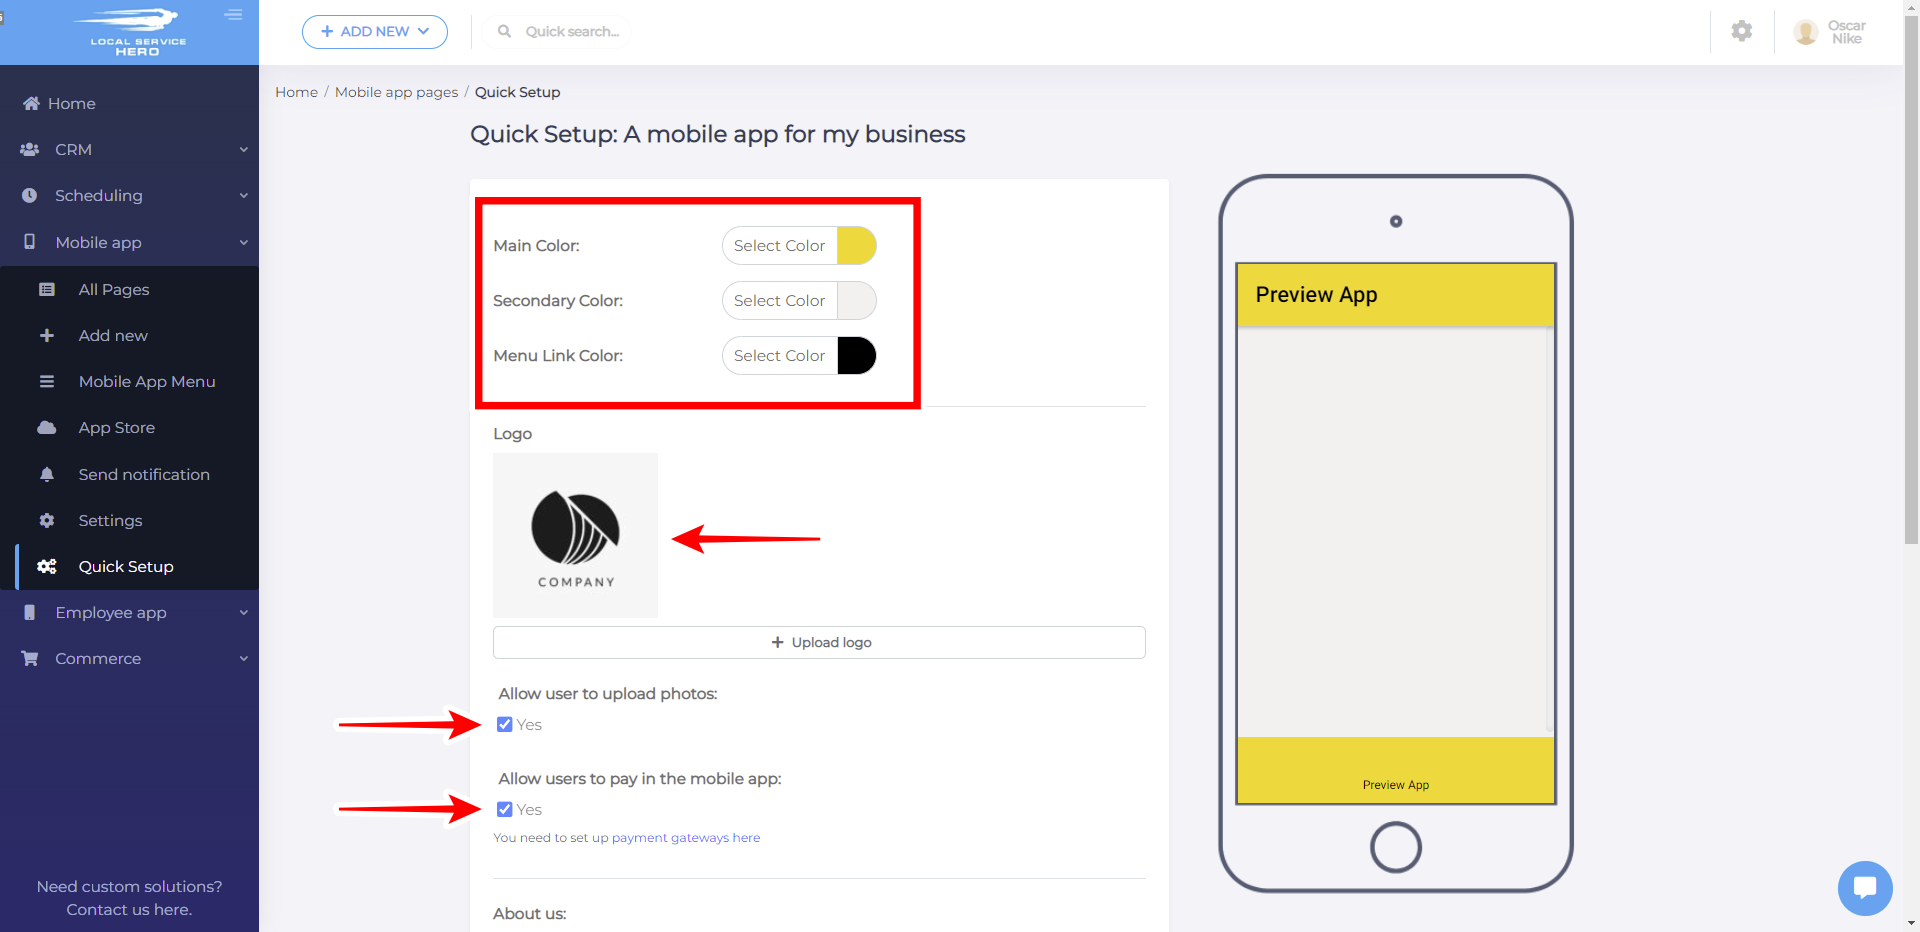
- About us: Enter a text telling your customers about your local service business.
- Blog Feed: You can share news with your customers by pasting your blog’s URL here.
- Allow users to fill these forms: Here you can select forms that you want your users to be able to fill from the app.
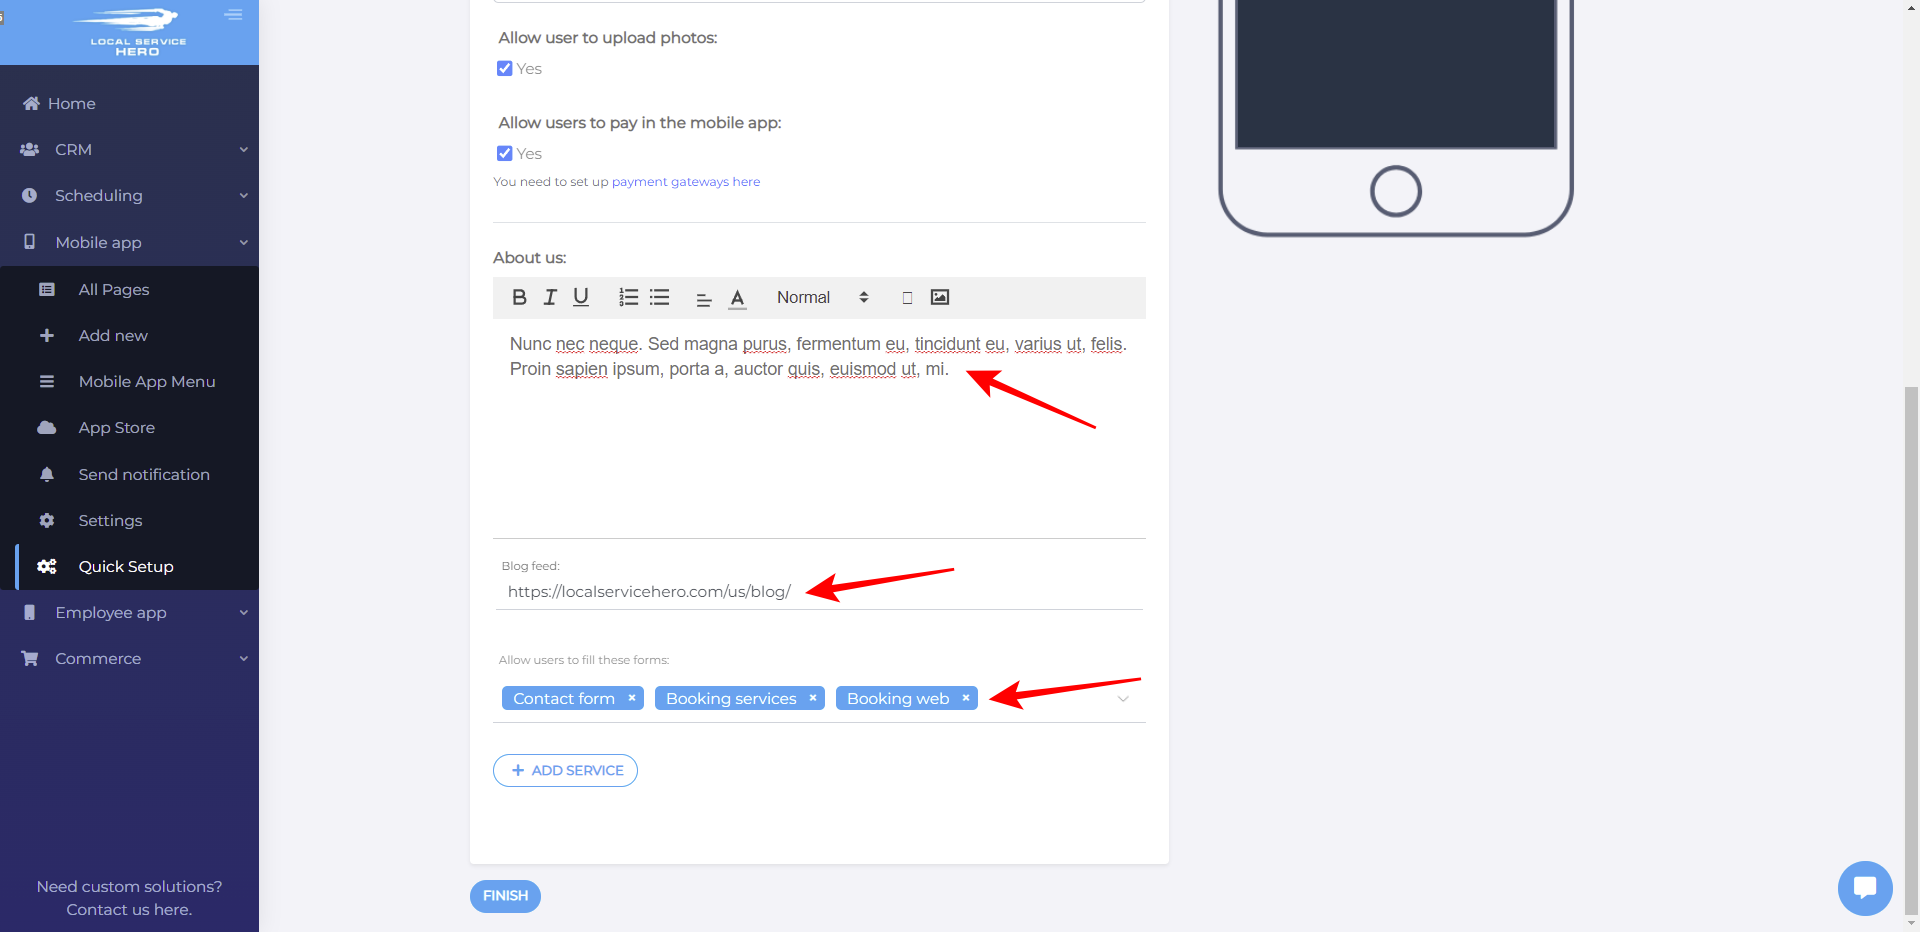
If you want to add services that users will be able to view and use from the mobile app, you can hit the Add service button, which will display a form where you can select a service.
- Name: Select the service name here.
- Select icon: You can select or upload an icon here.
- Link to this page: You can link this service to a specific mobile app page.
- Description: Add a text briefly describing your service.
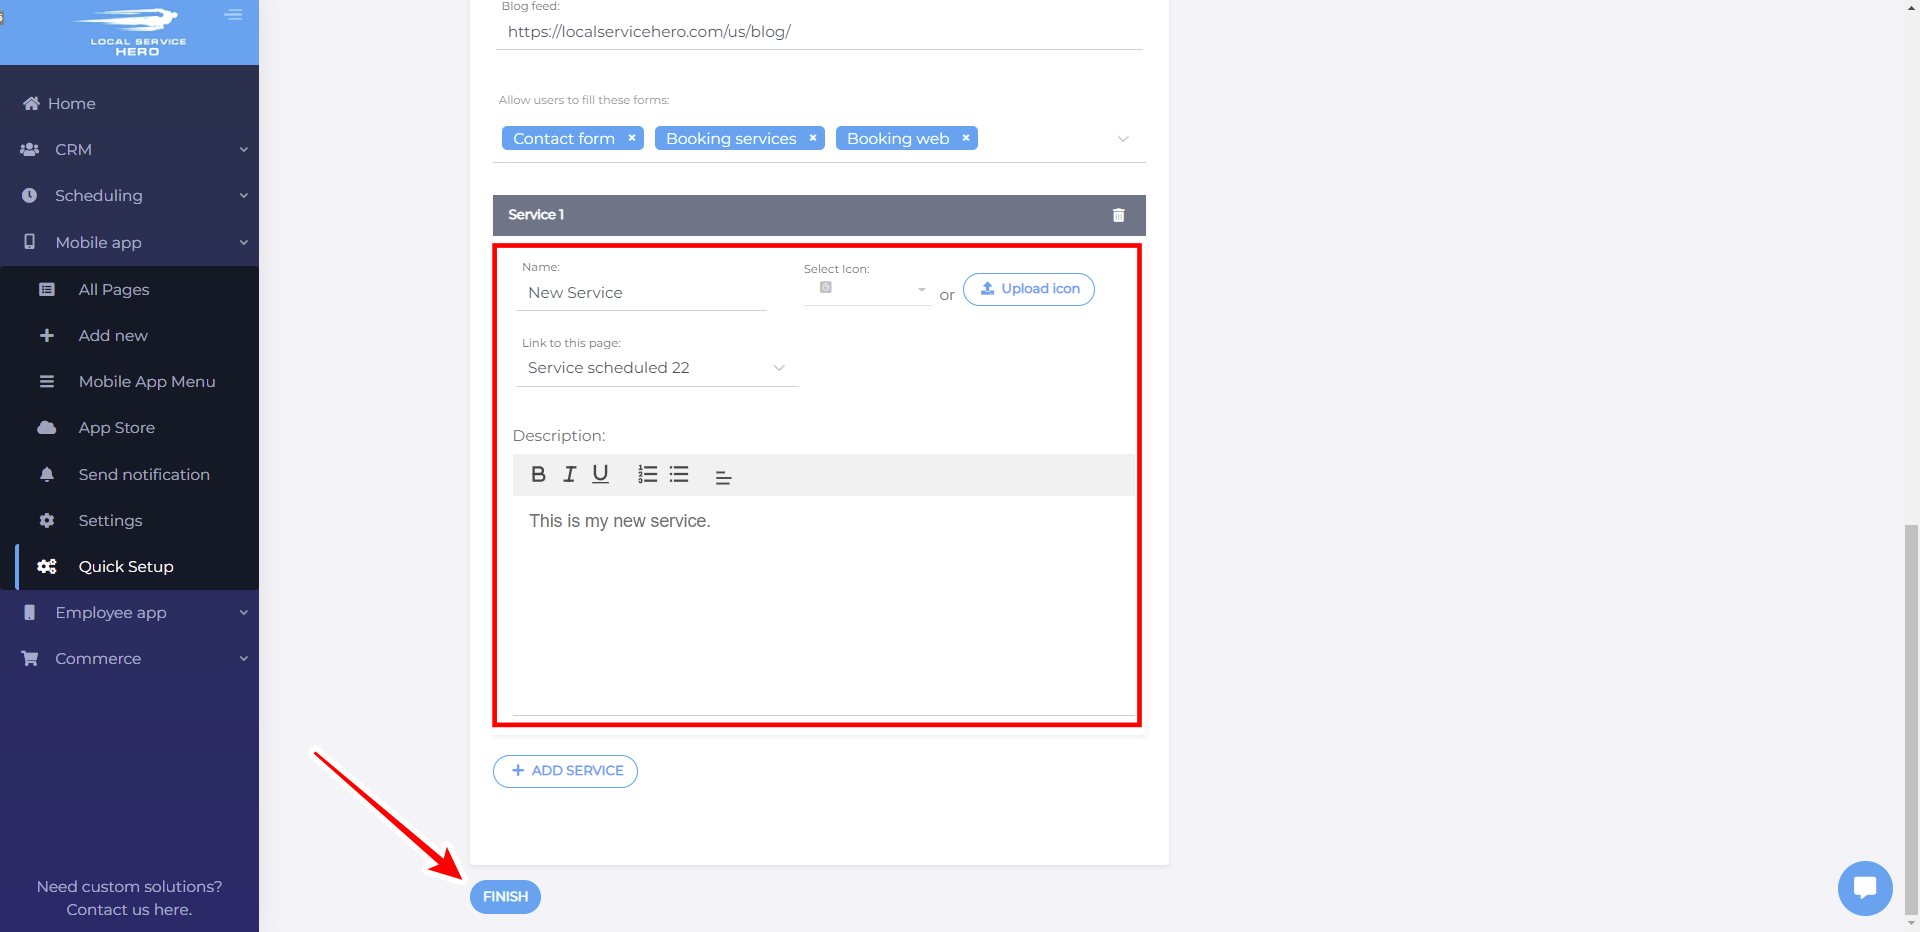
Once you’re done setting up your mobile app, click on Finish to save the changes.

