
In this tutorial, you will learn how to manage products in Local Service Hero.
Local Service Hero allows you to create and manage products, so you can sell your products on an online store.
When you activate the Commerce function for your company, you can create and manage products using an intuitive spreadsheet.
Here, we’ll show you how to add and manage a product:
1- Add a Product in Local Service Hero
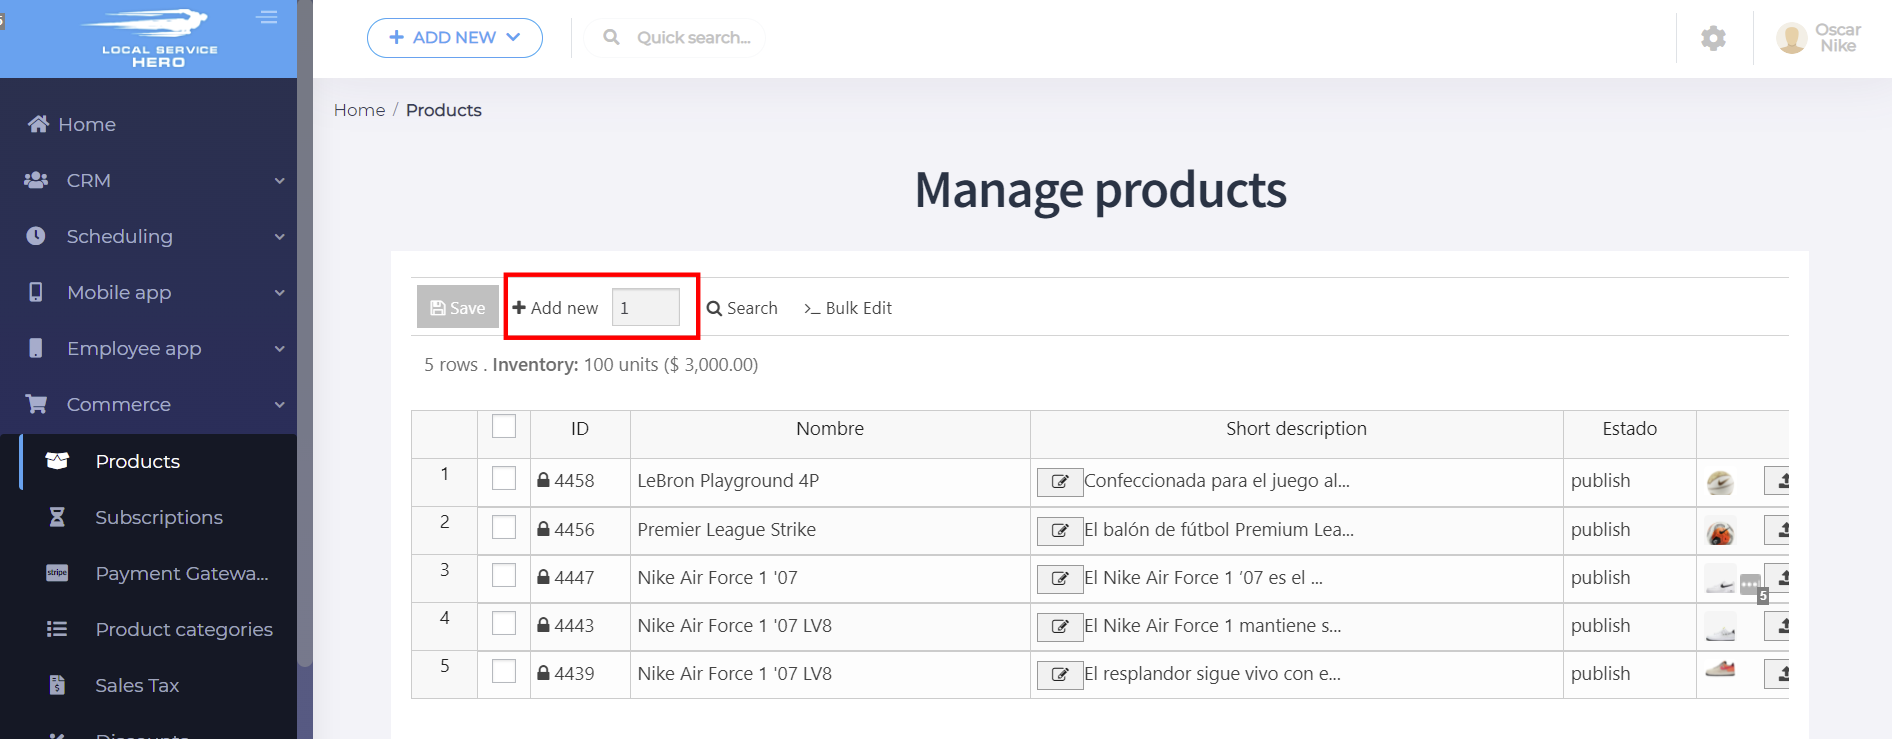
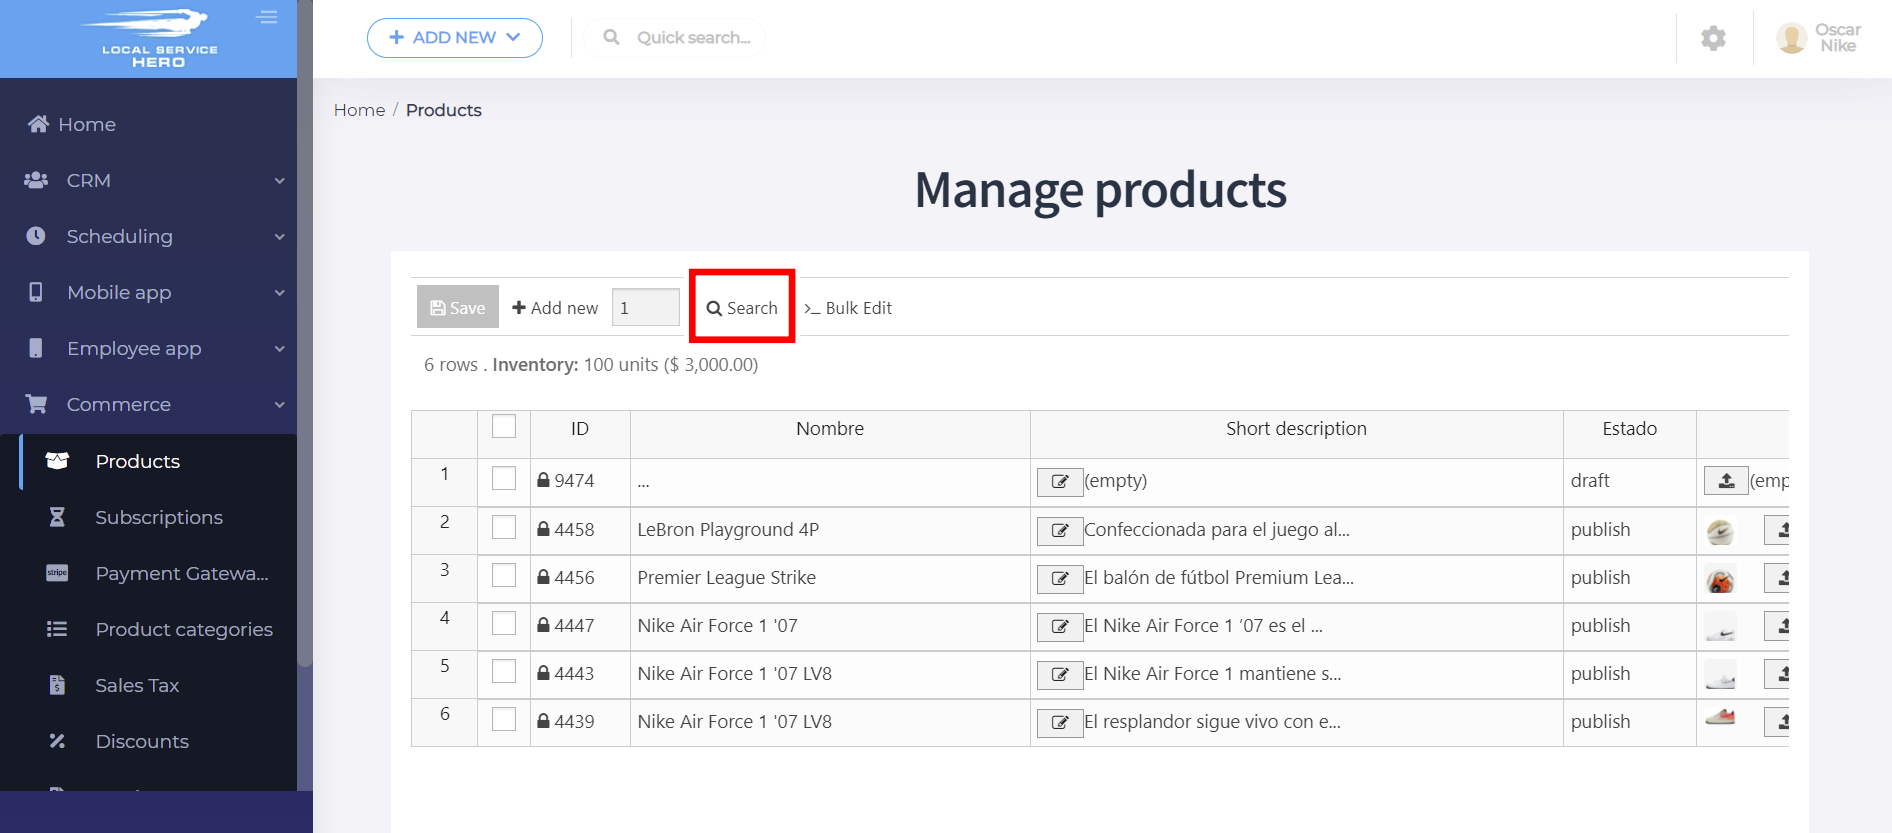
To add a new product in Local Service Hero, go to Commerce > Products. You’ll see the spreadsheet containing each product in a row and each field in a column.
You need to use the Add New field on the spreadsheet’s toolbar. You can add how many items you want to create, and then hit Add New.
In this example, we’ll add one product only.
2- Add the product information using the columns
Once you have added your product, you need to add its information. For this, you need to use the columns to add the name, short description, status, price, etc.
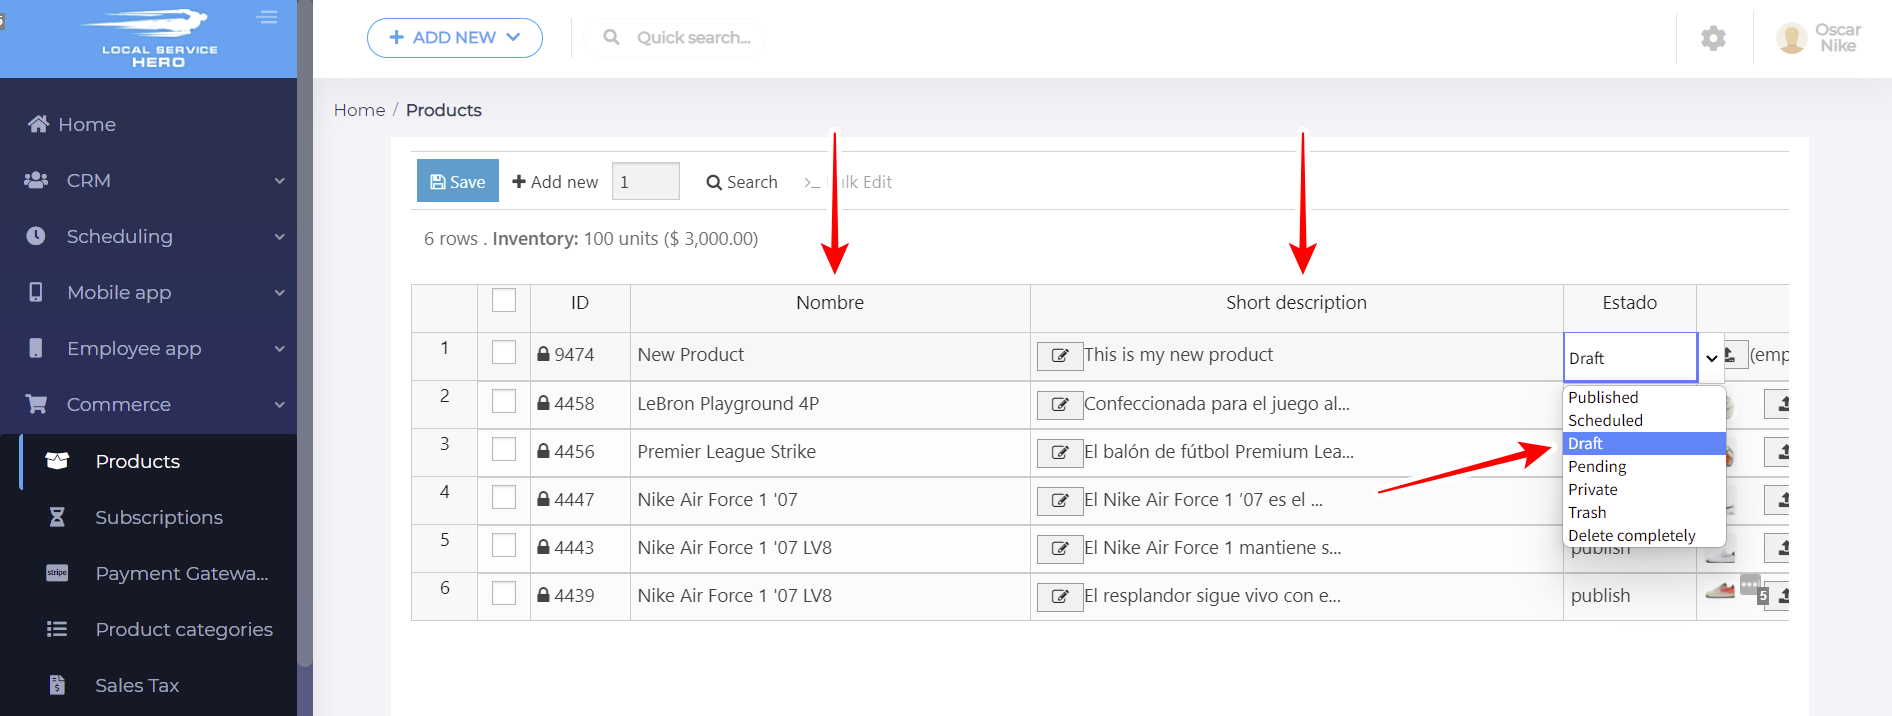
Every column works according to the field type. For example, the featured image field allows you to both upload the image or paste a URL. Besides, you can use dropdown fields, date fields, etc.

3- Save the product
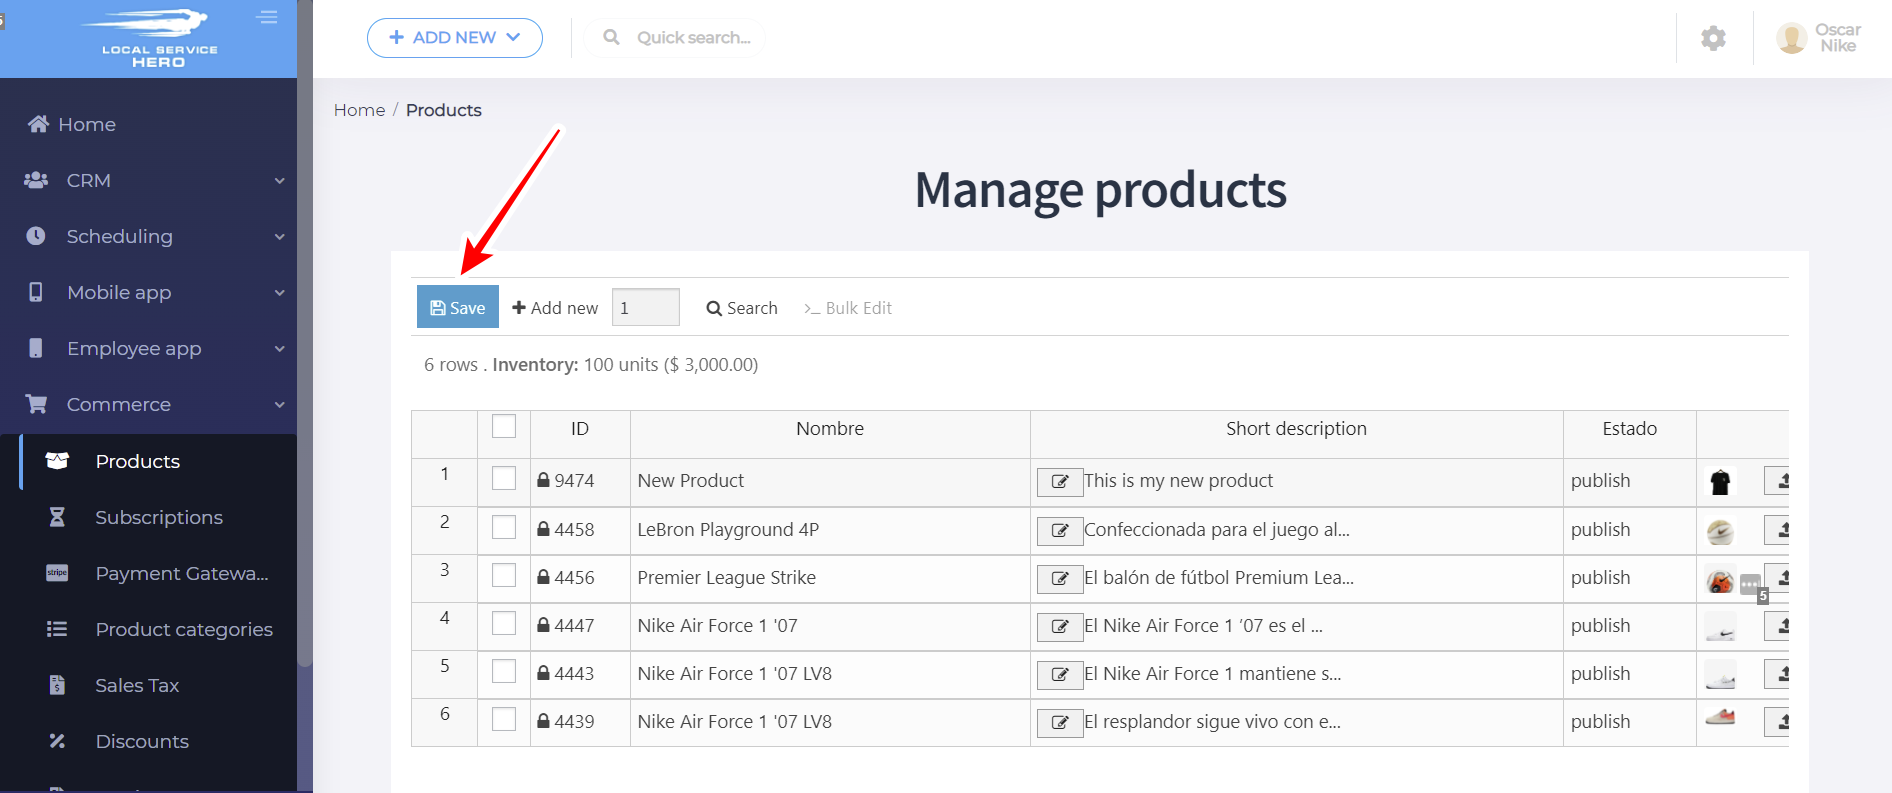
Once you’ve added all the product information, you need to hit Save to add the product.
4- How to Manage Products in Local Service Hero
Local Service Hero allows you to manage your products in bulk by applying advanced search filters and making bulk edits.
a) How to search for your products using advanced filters
First, let’s see how to filter your products by keyword, price, date, status, etc.
You need to open the Search tool with one click on it on the toolbar.
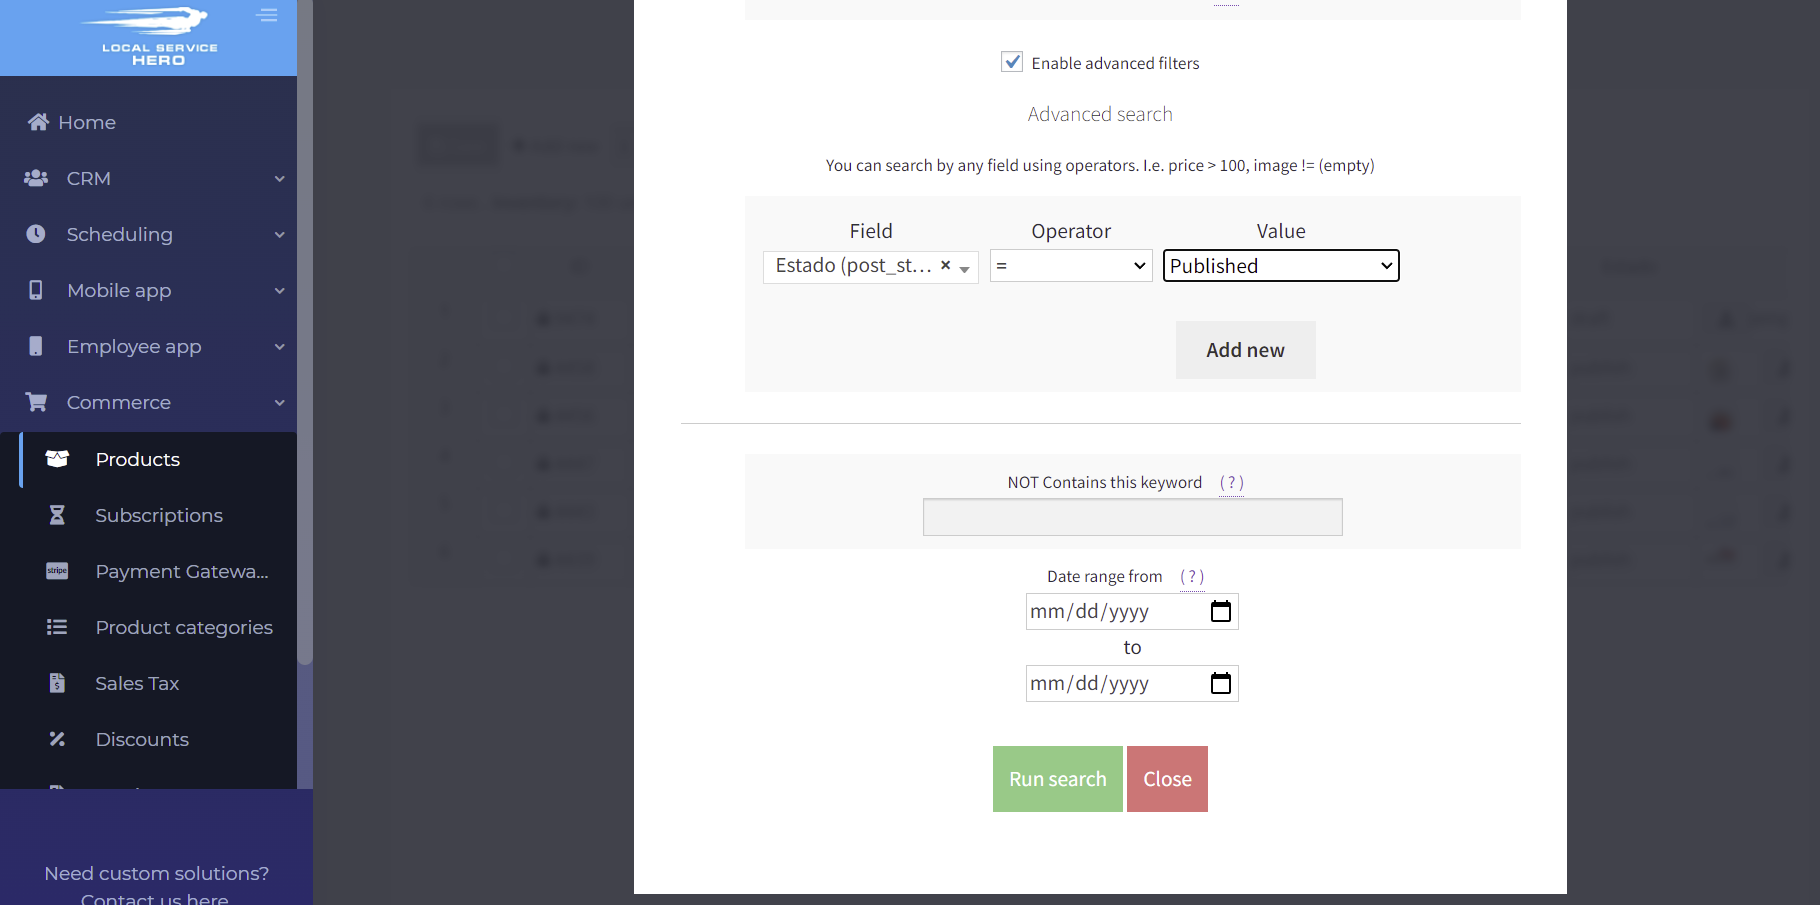
Once you open the Search tool, you will see the basic filters. You can use them to filter your products by keyword, product type, category, tag, shipping class, or attribute.
You can also Search on variations only.

If you tick the Enable advanced filters checkbox, you can search for products using any field.
For example, you can use the Status = Published values to find all published products.
You can also search for products excluding specific keywords.
Besides, you can find your products by date range.
Once you select your search values, hit Run search.
b) How to bulk edit your filtered products
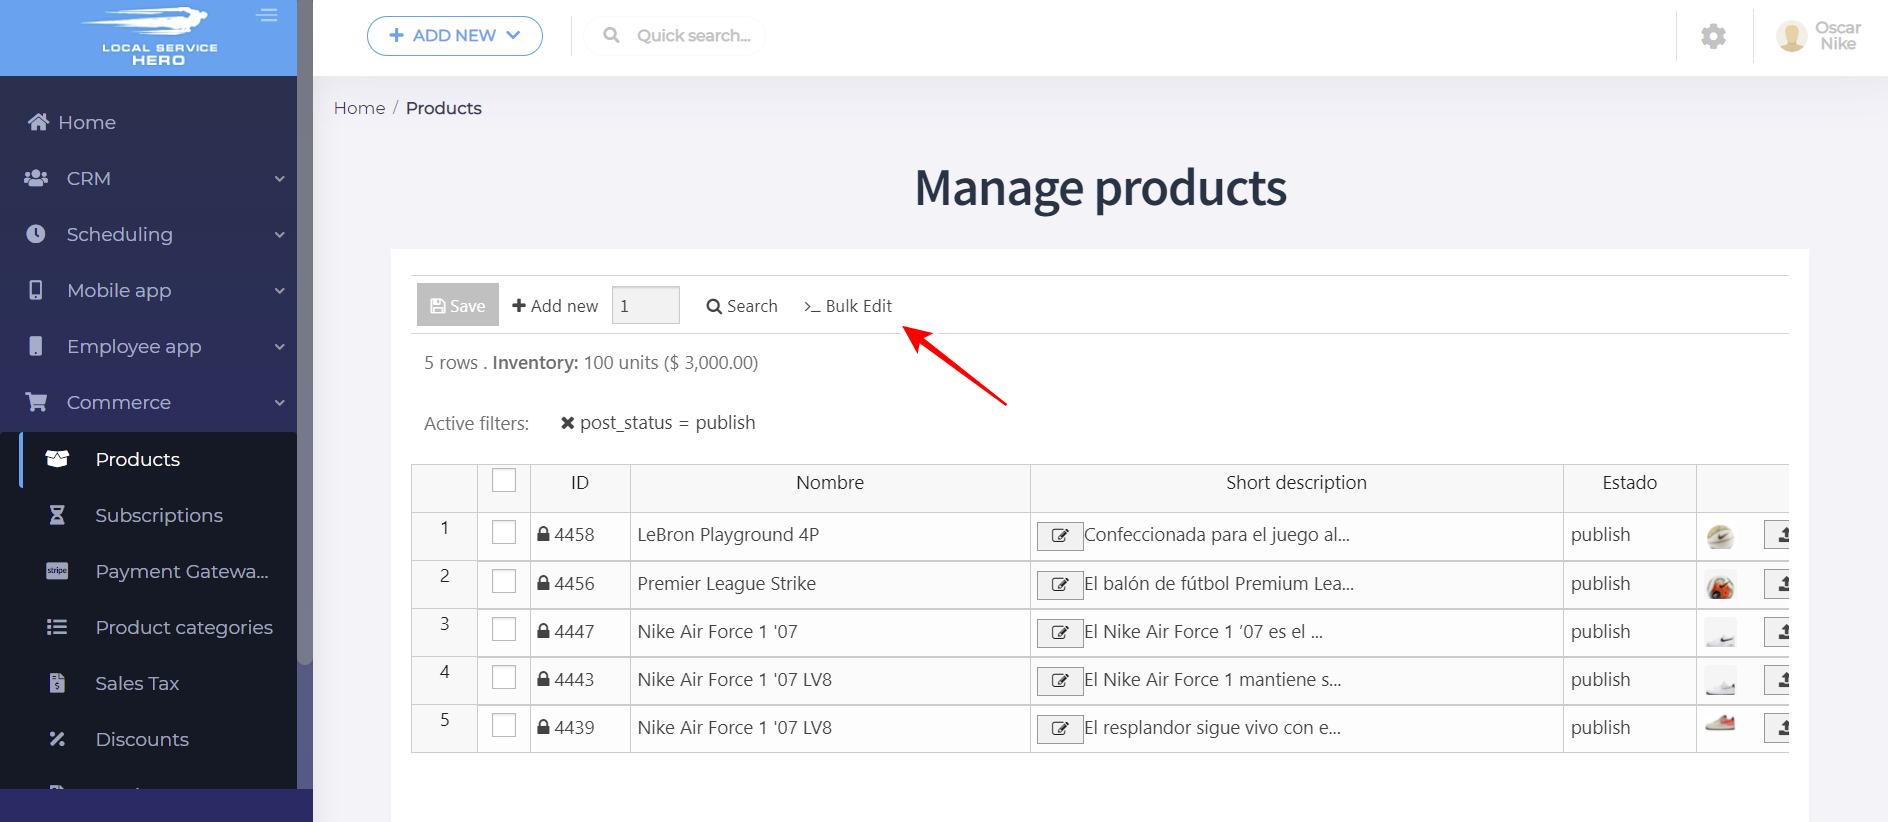
Once you filter the products, you will see them displayed on the spreadsheet. Now you can open the Bulk Edit tool with one click.
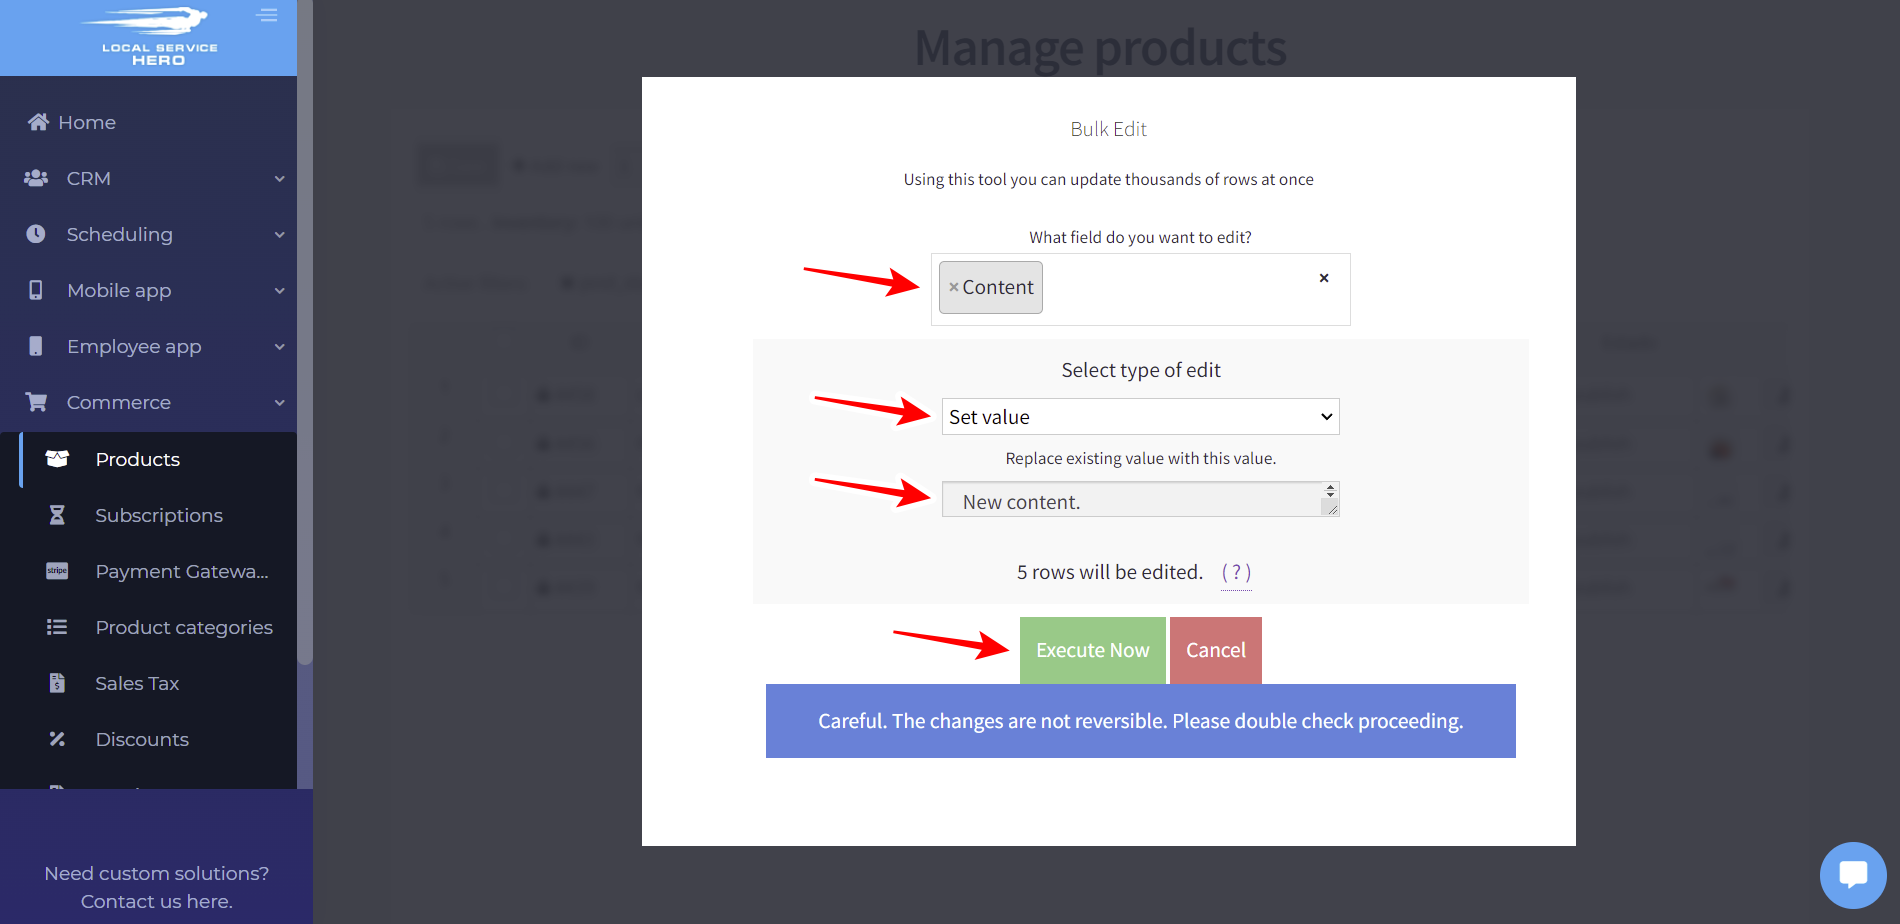
Once there, you can select which field you will edit, what type of edit you will apply, and the new values. For example, you can edit the product content by selecting these values:
- What field do you want to edit: Content
- Select type of edit: Set value
- Replace existing value with this value: Add the new content here.
- Hit Execute Now.
This is how you can create and manage products in Local Service Hero.


