
In this tutorial, we’ll show you how to import sales taxes in Local Service Hero.
Setting up the tax rates correctly is really important if you want to avoid problems on your local business. That’s why here we’ll show you how to import sales taxes in Local Service Hero, using a CSV file you’ve created on Excel or Google Sheets.
Just follow these simple steps.
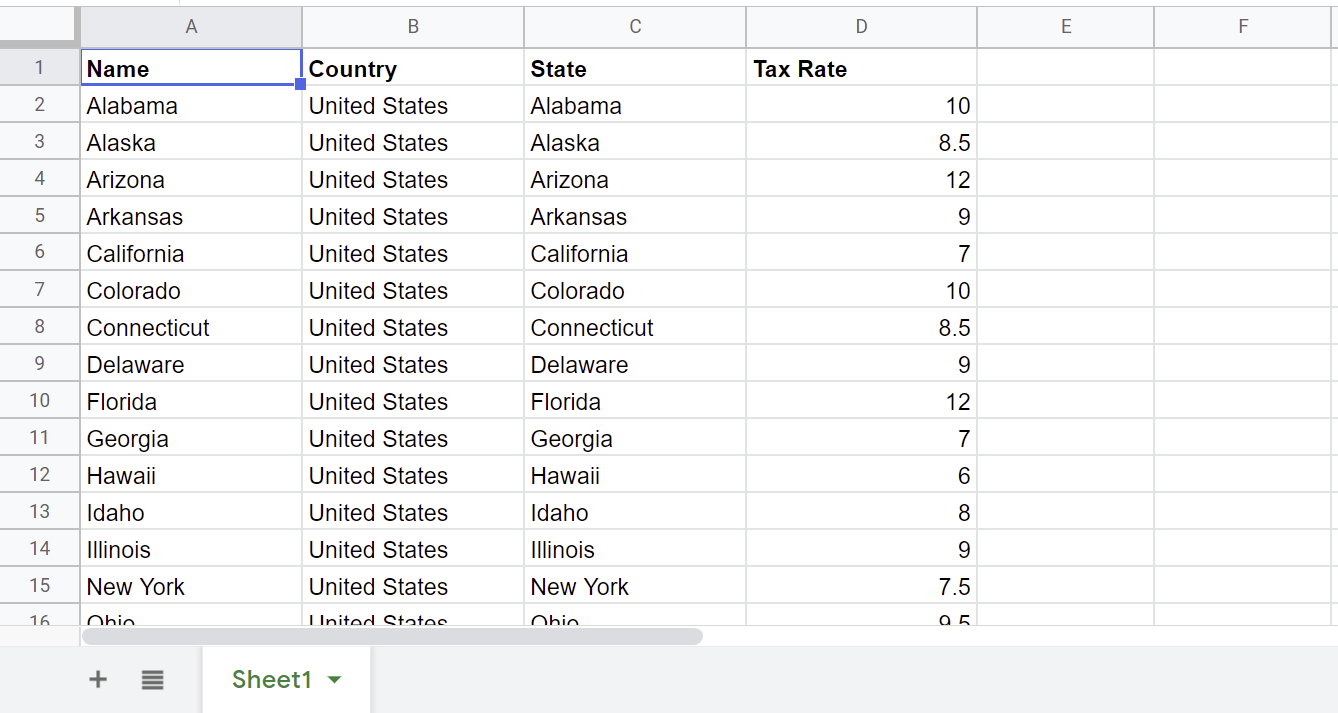
1- Prepare the tax rates on a CSV file
To be able to import the tax rates, you need to create a CSV file containing the following columns:
- Name
- Country
- State
- Post Code
- City
- Tax rate
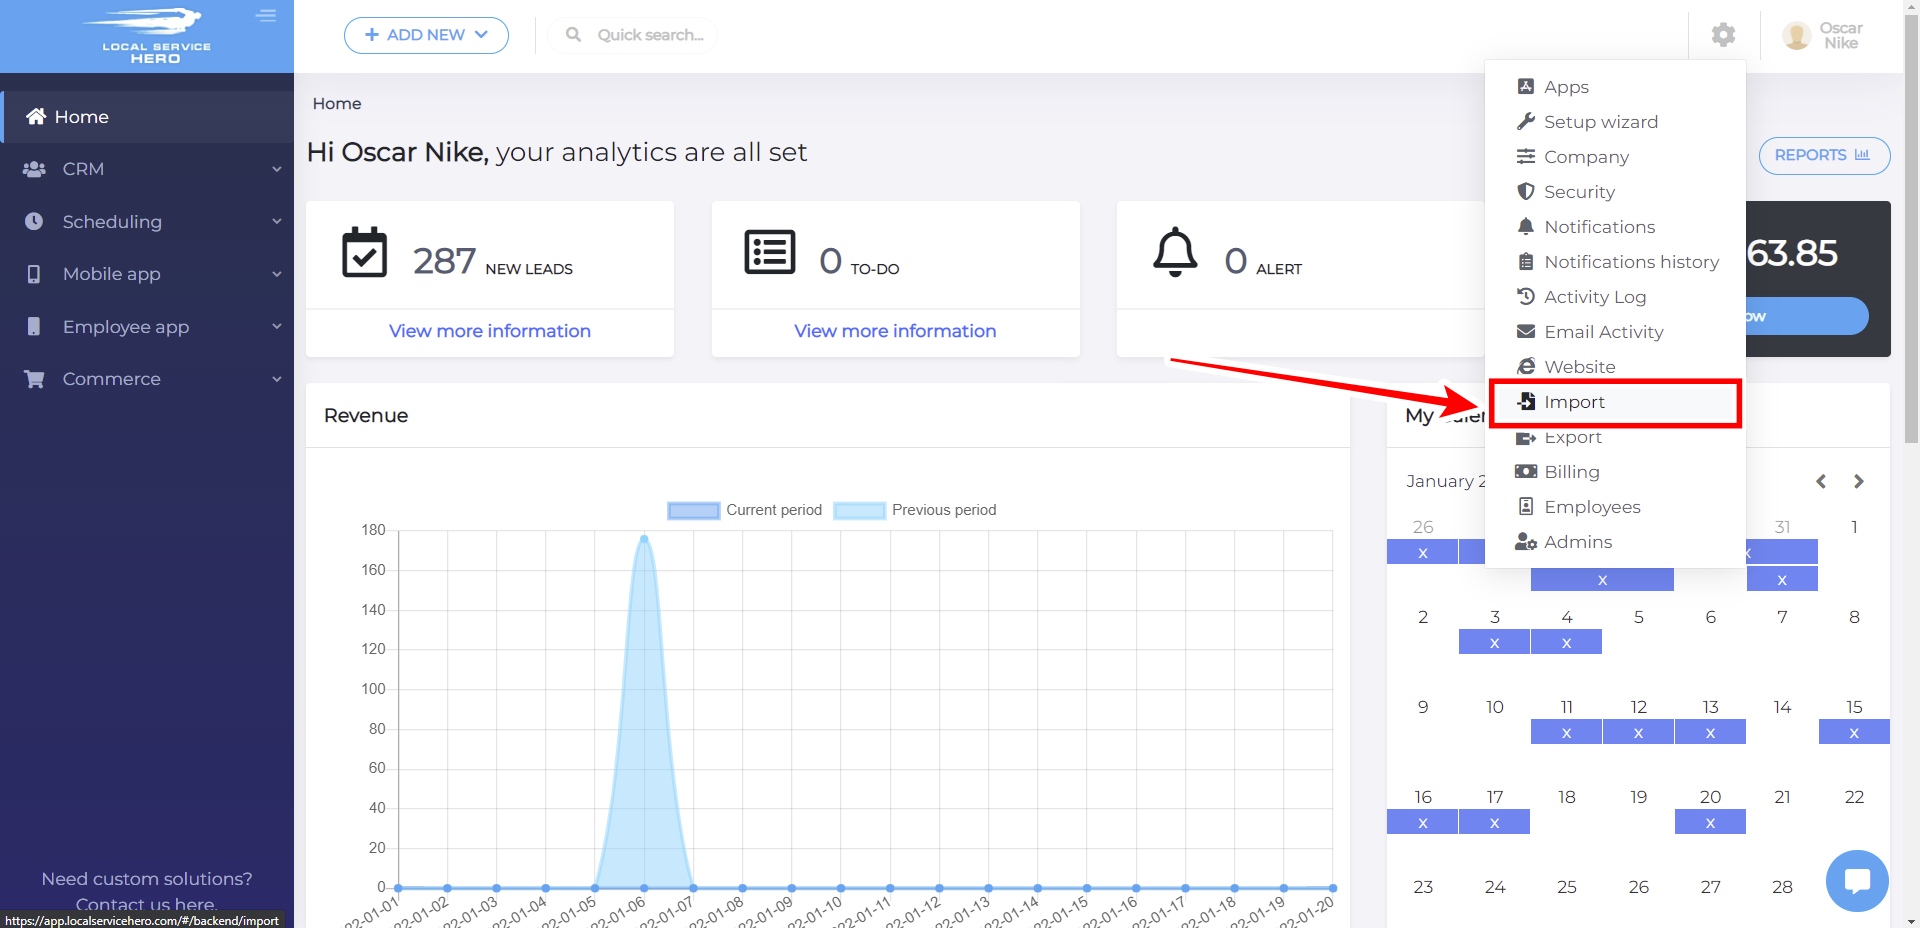
2- Open the “Import” tool in Local Service Hero
To open the Import tool, you need to go to Settings > Import.
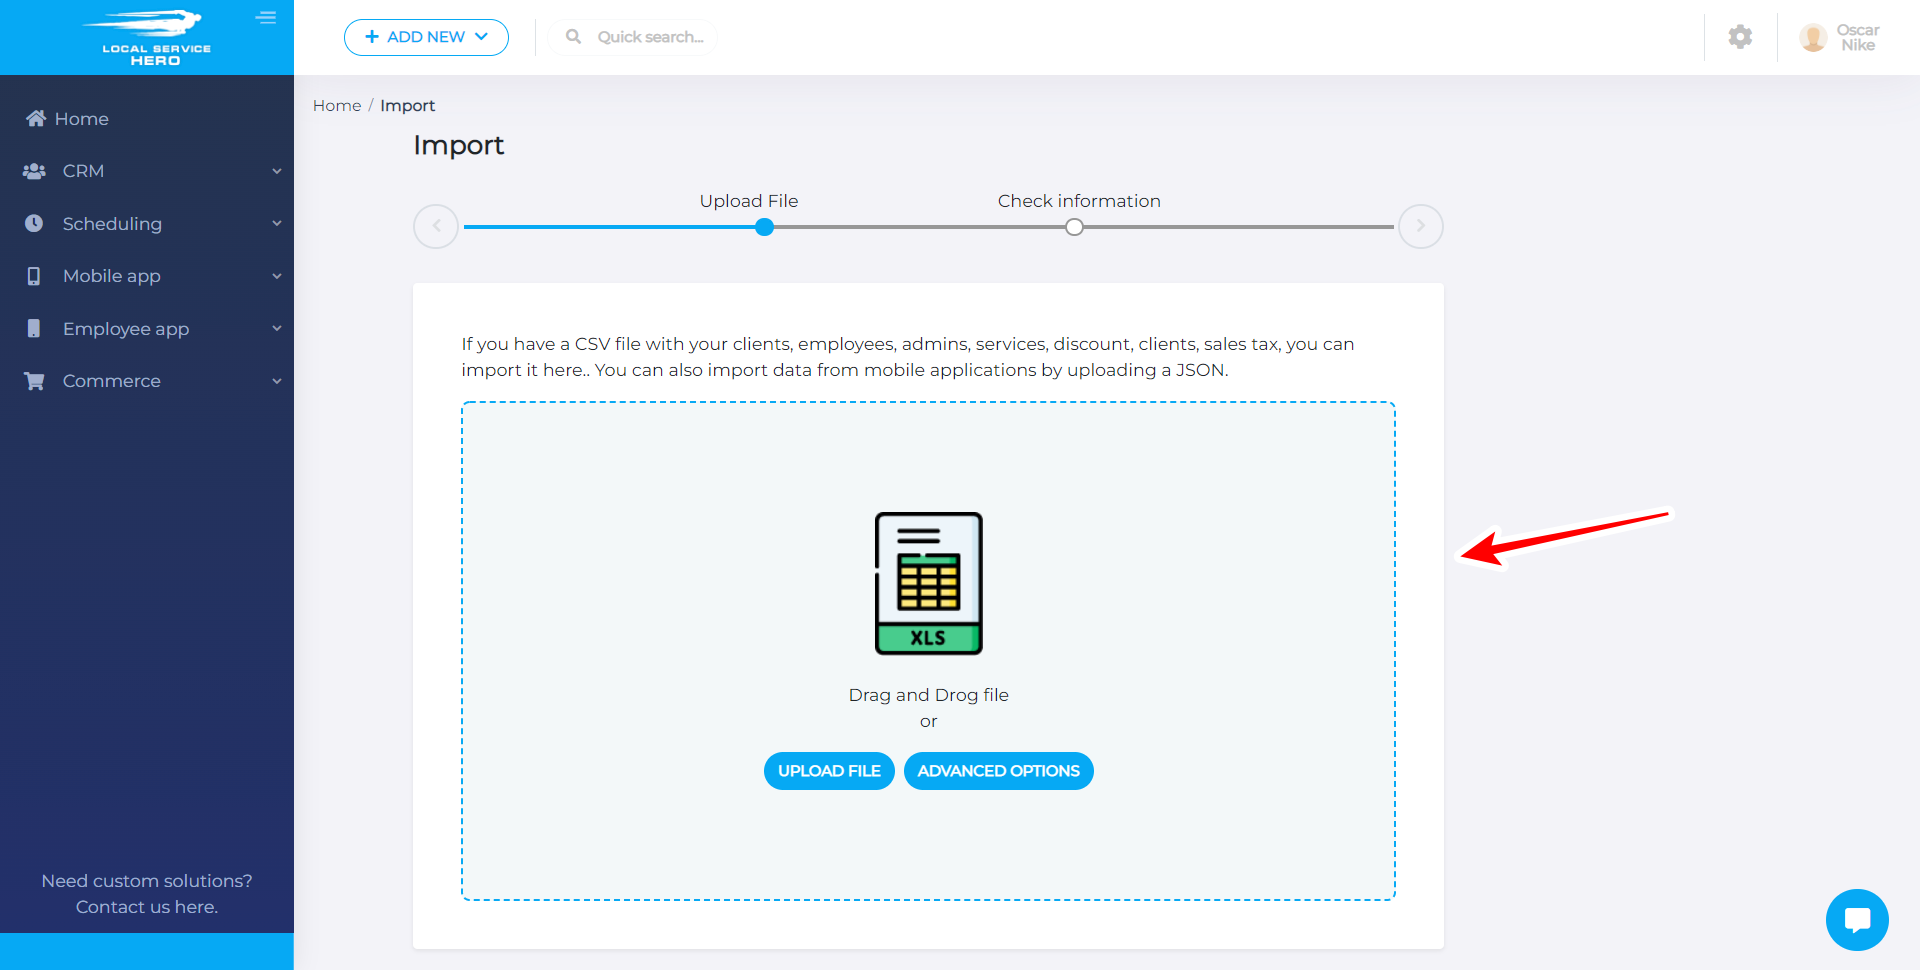
3- Upload the CSV file
Once you open the Import tool, you need to click the Upload File button and select the CSV file from your computer. You can also Drag and Drop the file.
3- Match the file columns in the file with the profile fields
To match the file columns with the profile fields in Local Service Hero, you need to:
- Select Sales Tax in the What information are you importing dropdown
- Match the File Columns with the Profile Files
- Click on Start Import

Once you hit Start Import, your tax rates will be imported to your Local Service Hero dashboard.


