
Let’s see how to manage payment gateways in Local Service Hero. You can use different payment methods to manage payments from your clients in Local Service Hero.
After you log in to your Local Service Hero dashboard, go to Commerce > Payment Gateways. There, you’ll see two tabs to manage the way you receive payments and the payment methods.
In “Receive Payments”, you can create direct URLs to have your clients pay for any subscription. This is great to create a payment form for every subscription you have created in Local Service Hero.
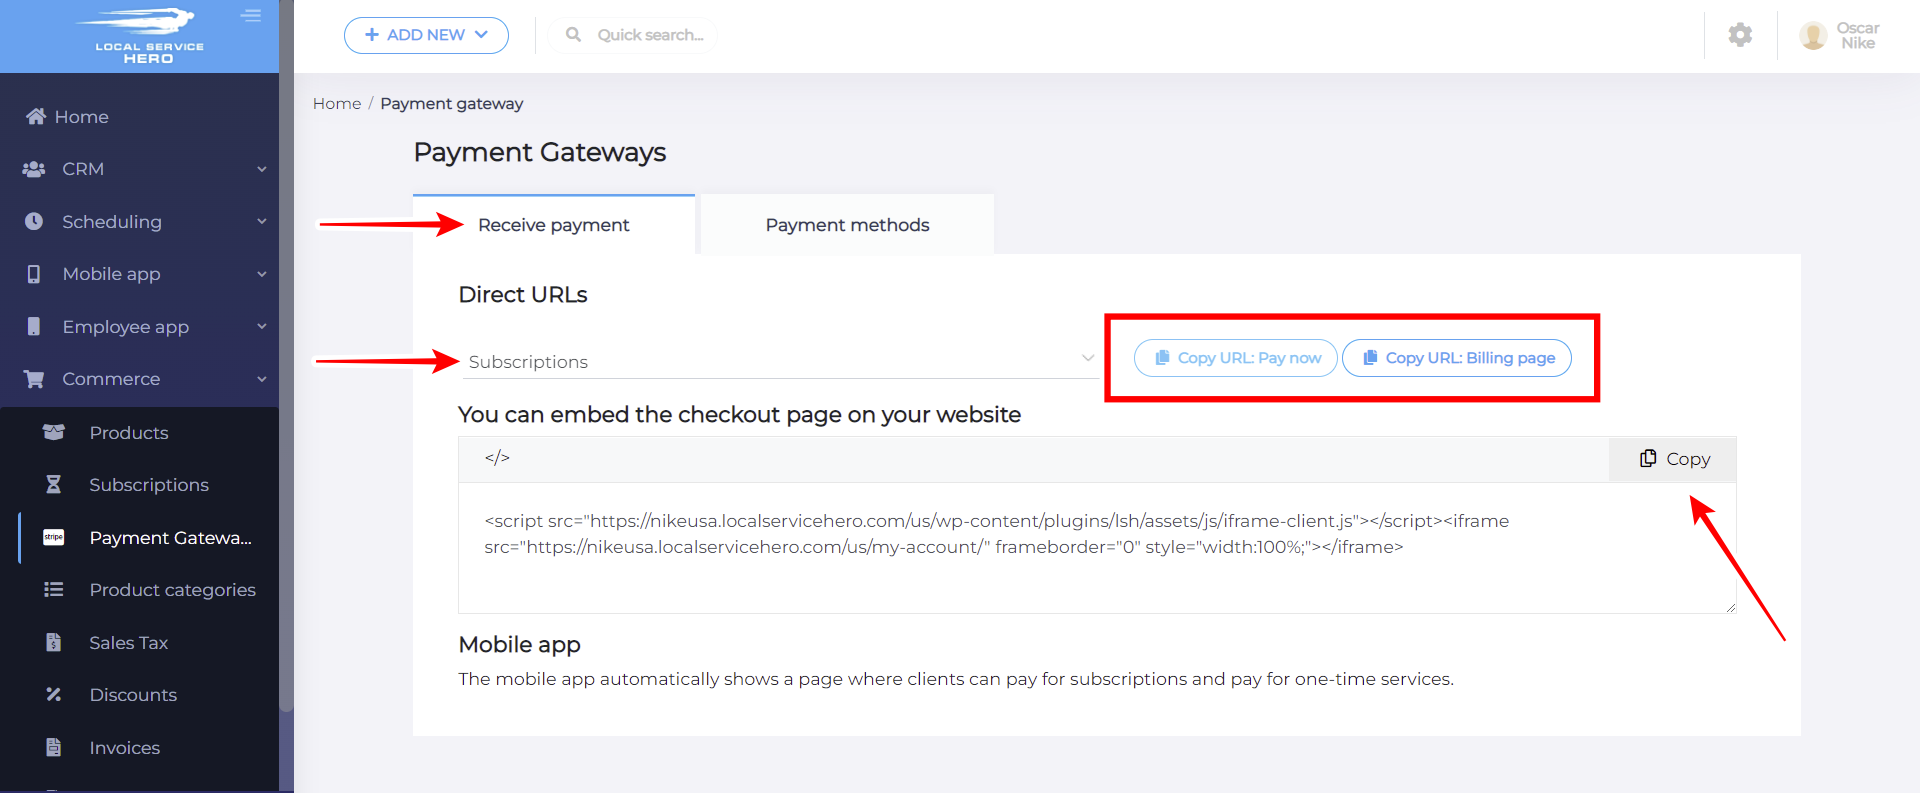
You just need to select the subscription, and then you can copy the “Pay Now” URL, which will send users to pay for this specific subscription. You can also copy the “Billing Page” URL.
If you want to embed a payment page on any post or page, you can copy the code and paste it where you want to display it.
The mobile app automatically shows a page where clients can pay for subscriptions and pay for one-time services.
If you move to the “Payment methods” tab, you can view all the available payment gateways, which you can enable or disable as you wish. These are the available payment gateways:
- PayPal LSH
- Bank transfer – Payment Gateway
- Cheque – Payment Gateway
- Stripe – Payment Gateway
- Authorize.net – Payment Gateway
- PayPal Checkout
- Pago mediante saldo en monedero
- Cash on delivery
As you see, you can control the way you receive payments and manage payment gateways in Local Service Hero.

")
