

In this guide, we’ll show you how to manage the commerce settings in Local Service Hero.
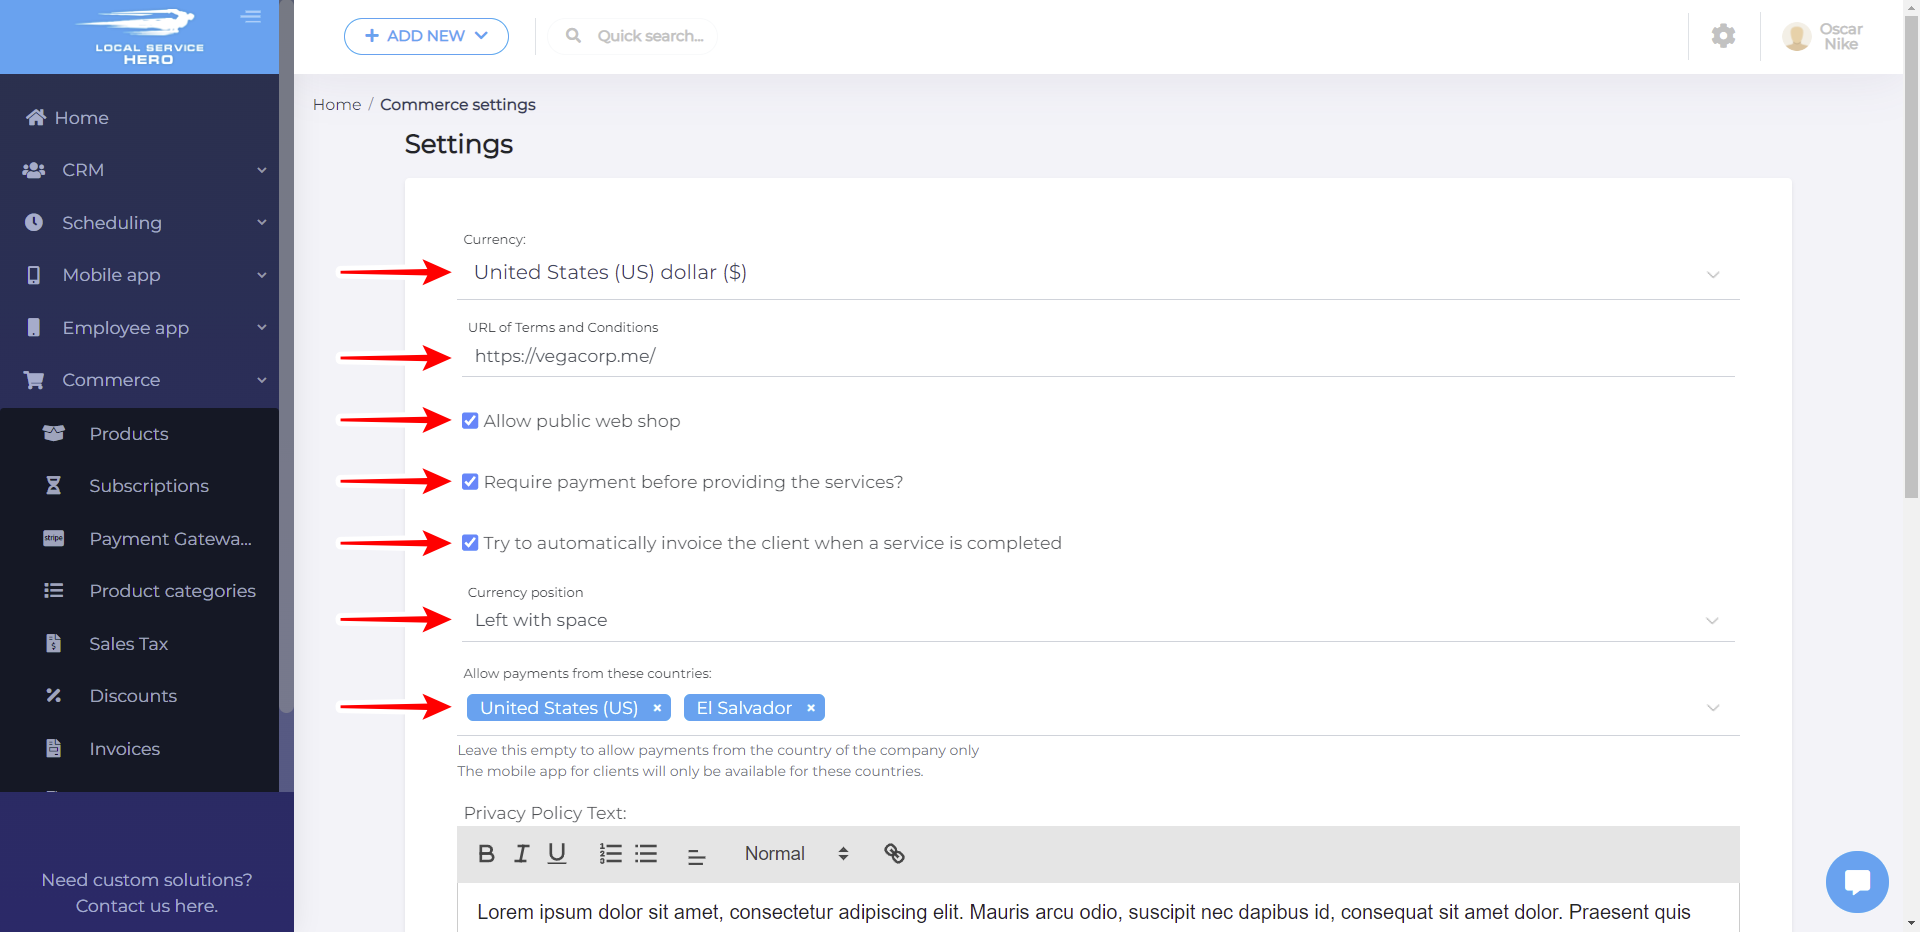
First, you need to go to Commerce > Settings.
Once you’re on the page, you can manage the following settings:
- Currency: Here you need to select the currency you use to manage payments.
- URL of Terms and Conditions: If you have a “Terms and Conditions” page, enter the URL here.
- Allow public web shop: Select “Yes” or “No”
- Require payment before providing the services: Select “Yes” or “No”
- Try to automatically invoice the client when a service is completed: Select “Yes” or “No”
- Currency position: You can select “Left”, “Right”, “Left with space”, “Right with space”
- Allow payments from these countries: Enter the countries from which you accept payments. You can leave this field empty to allow payments from the country of the company only. The mobile app for clients will only be available for these countries.
- Privacy Policy Text: Here you can write a small paragraph indicating that they accept your privacy policy with a link to the privacy policy on your website.
- Thousand separator: Enter a comma or a period here.
- Number of decimals: Enter how many decimals you will accept in prices.
- Decimal separator: Enter a comma or a period.
- Minimum order amount: Enter a minimum amount the users’ orders need to have to be able to place the order.
- Minimum order amount message: You can use {cart_total} and {minimum_amount} in the message. For example: The minimum amount of the order must be {minimum_amount} and your order total is {cart_total}. Add more products/services to your order.
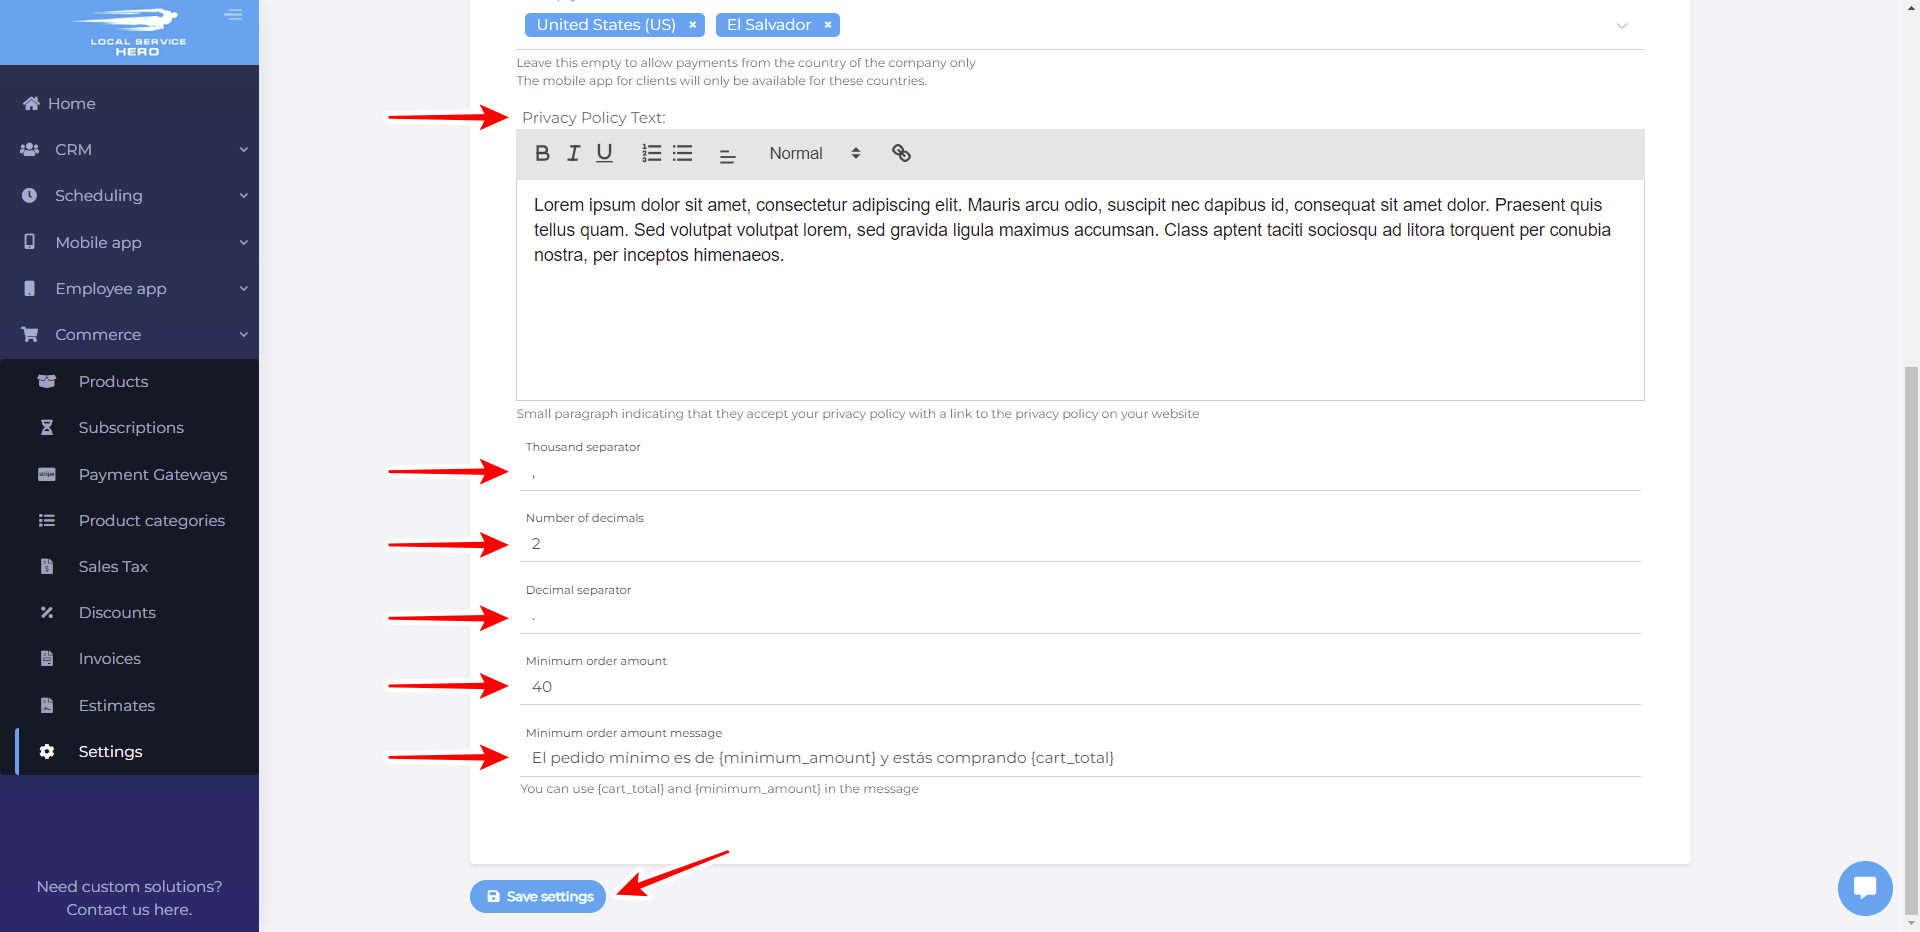
Once you have selected all the settings, you need to hit “Save”.
This is how you can manage the commerce settings in Local Service Hero.


