
Let’s learn how to create forms in Local Service Hero.
Local Service Hero allows you to create forms to get new leads, allow your potential customers to get a quote, contact forms, and employee forms.
The best thing is that these forms can be embedded in a page of your website, or you can share them on your business’s social networks so that people can fill out the forms with their information.
That’s why here we show you the steps you need to follow in order to create a form for your website, email marketing campaign, or social networks.
1- Add a new form in Local Service Hero
You have at least two ways to add a new form in Local Service Hero.
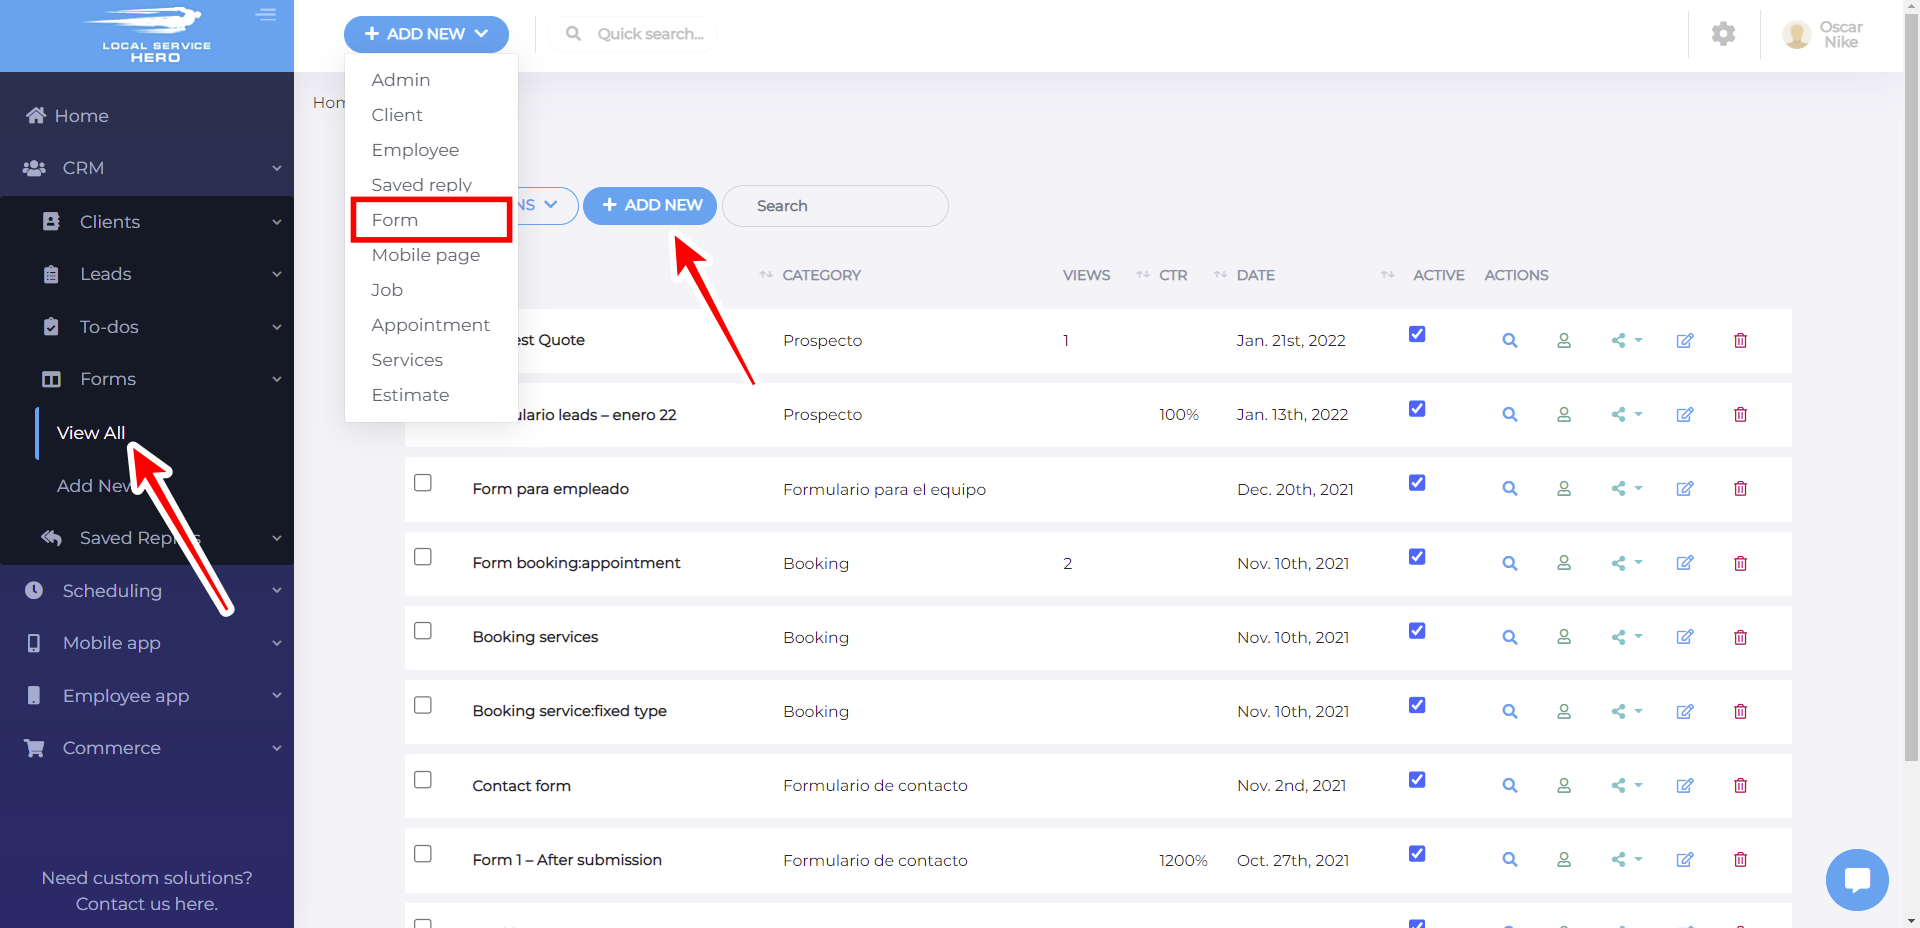
First, you can use the Add New dropdown and select Form.
Second, you can go to CRM > Forms and click Add New.
2- Select the basic information of your new form
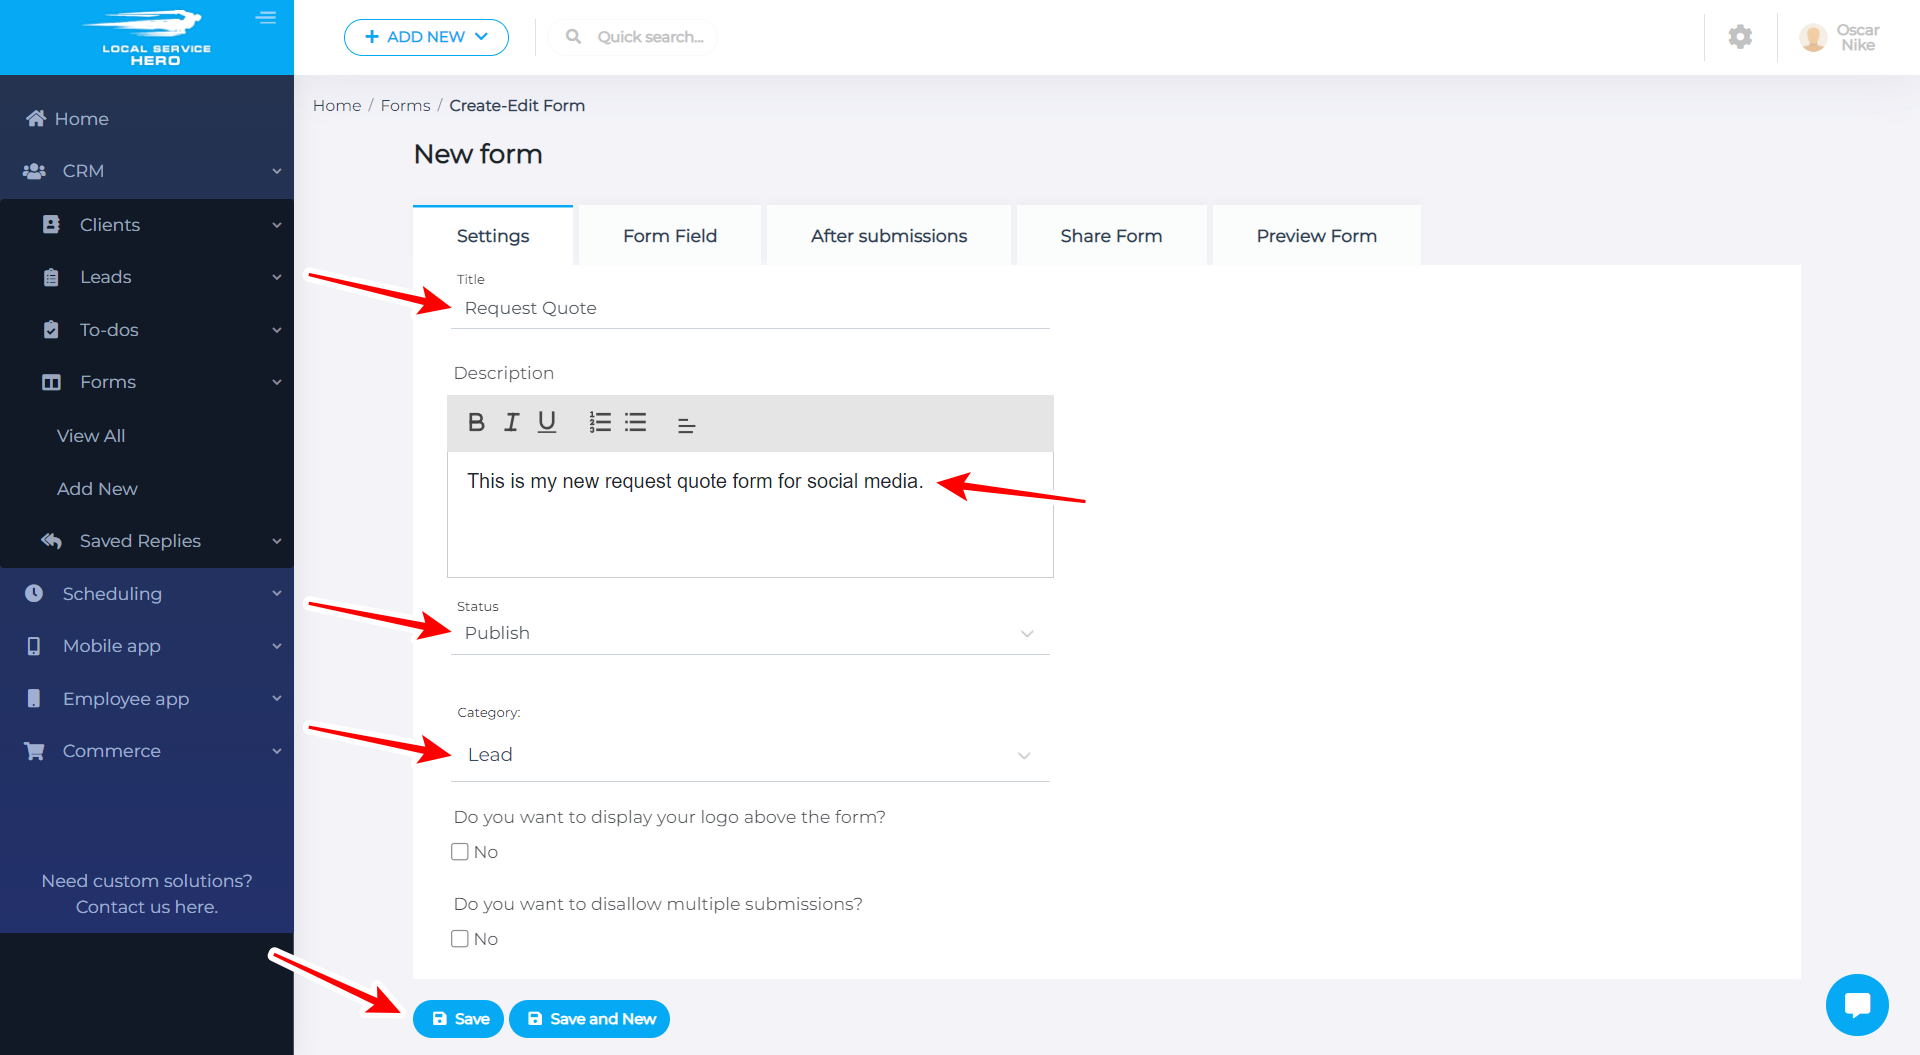
Once you open the form creator, you need to configure the basic information of your new form under the Settings tab.
You can do this by selecting the following information:
- Title
- Description
- Status
- Category. In this case, we’ll select Lead.
You can also decide if you want to hide your logo from above the form, and if you want to disallow multiple submissions for this form.
3- Add the form fields
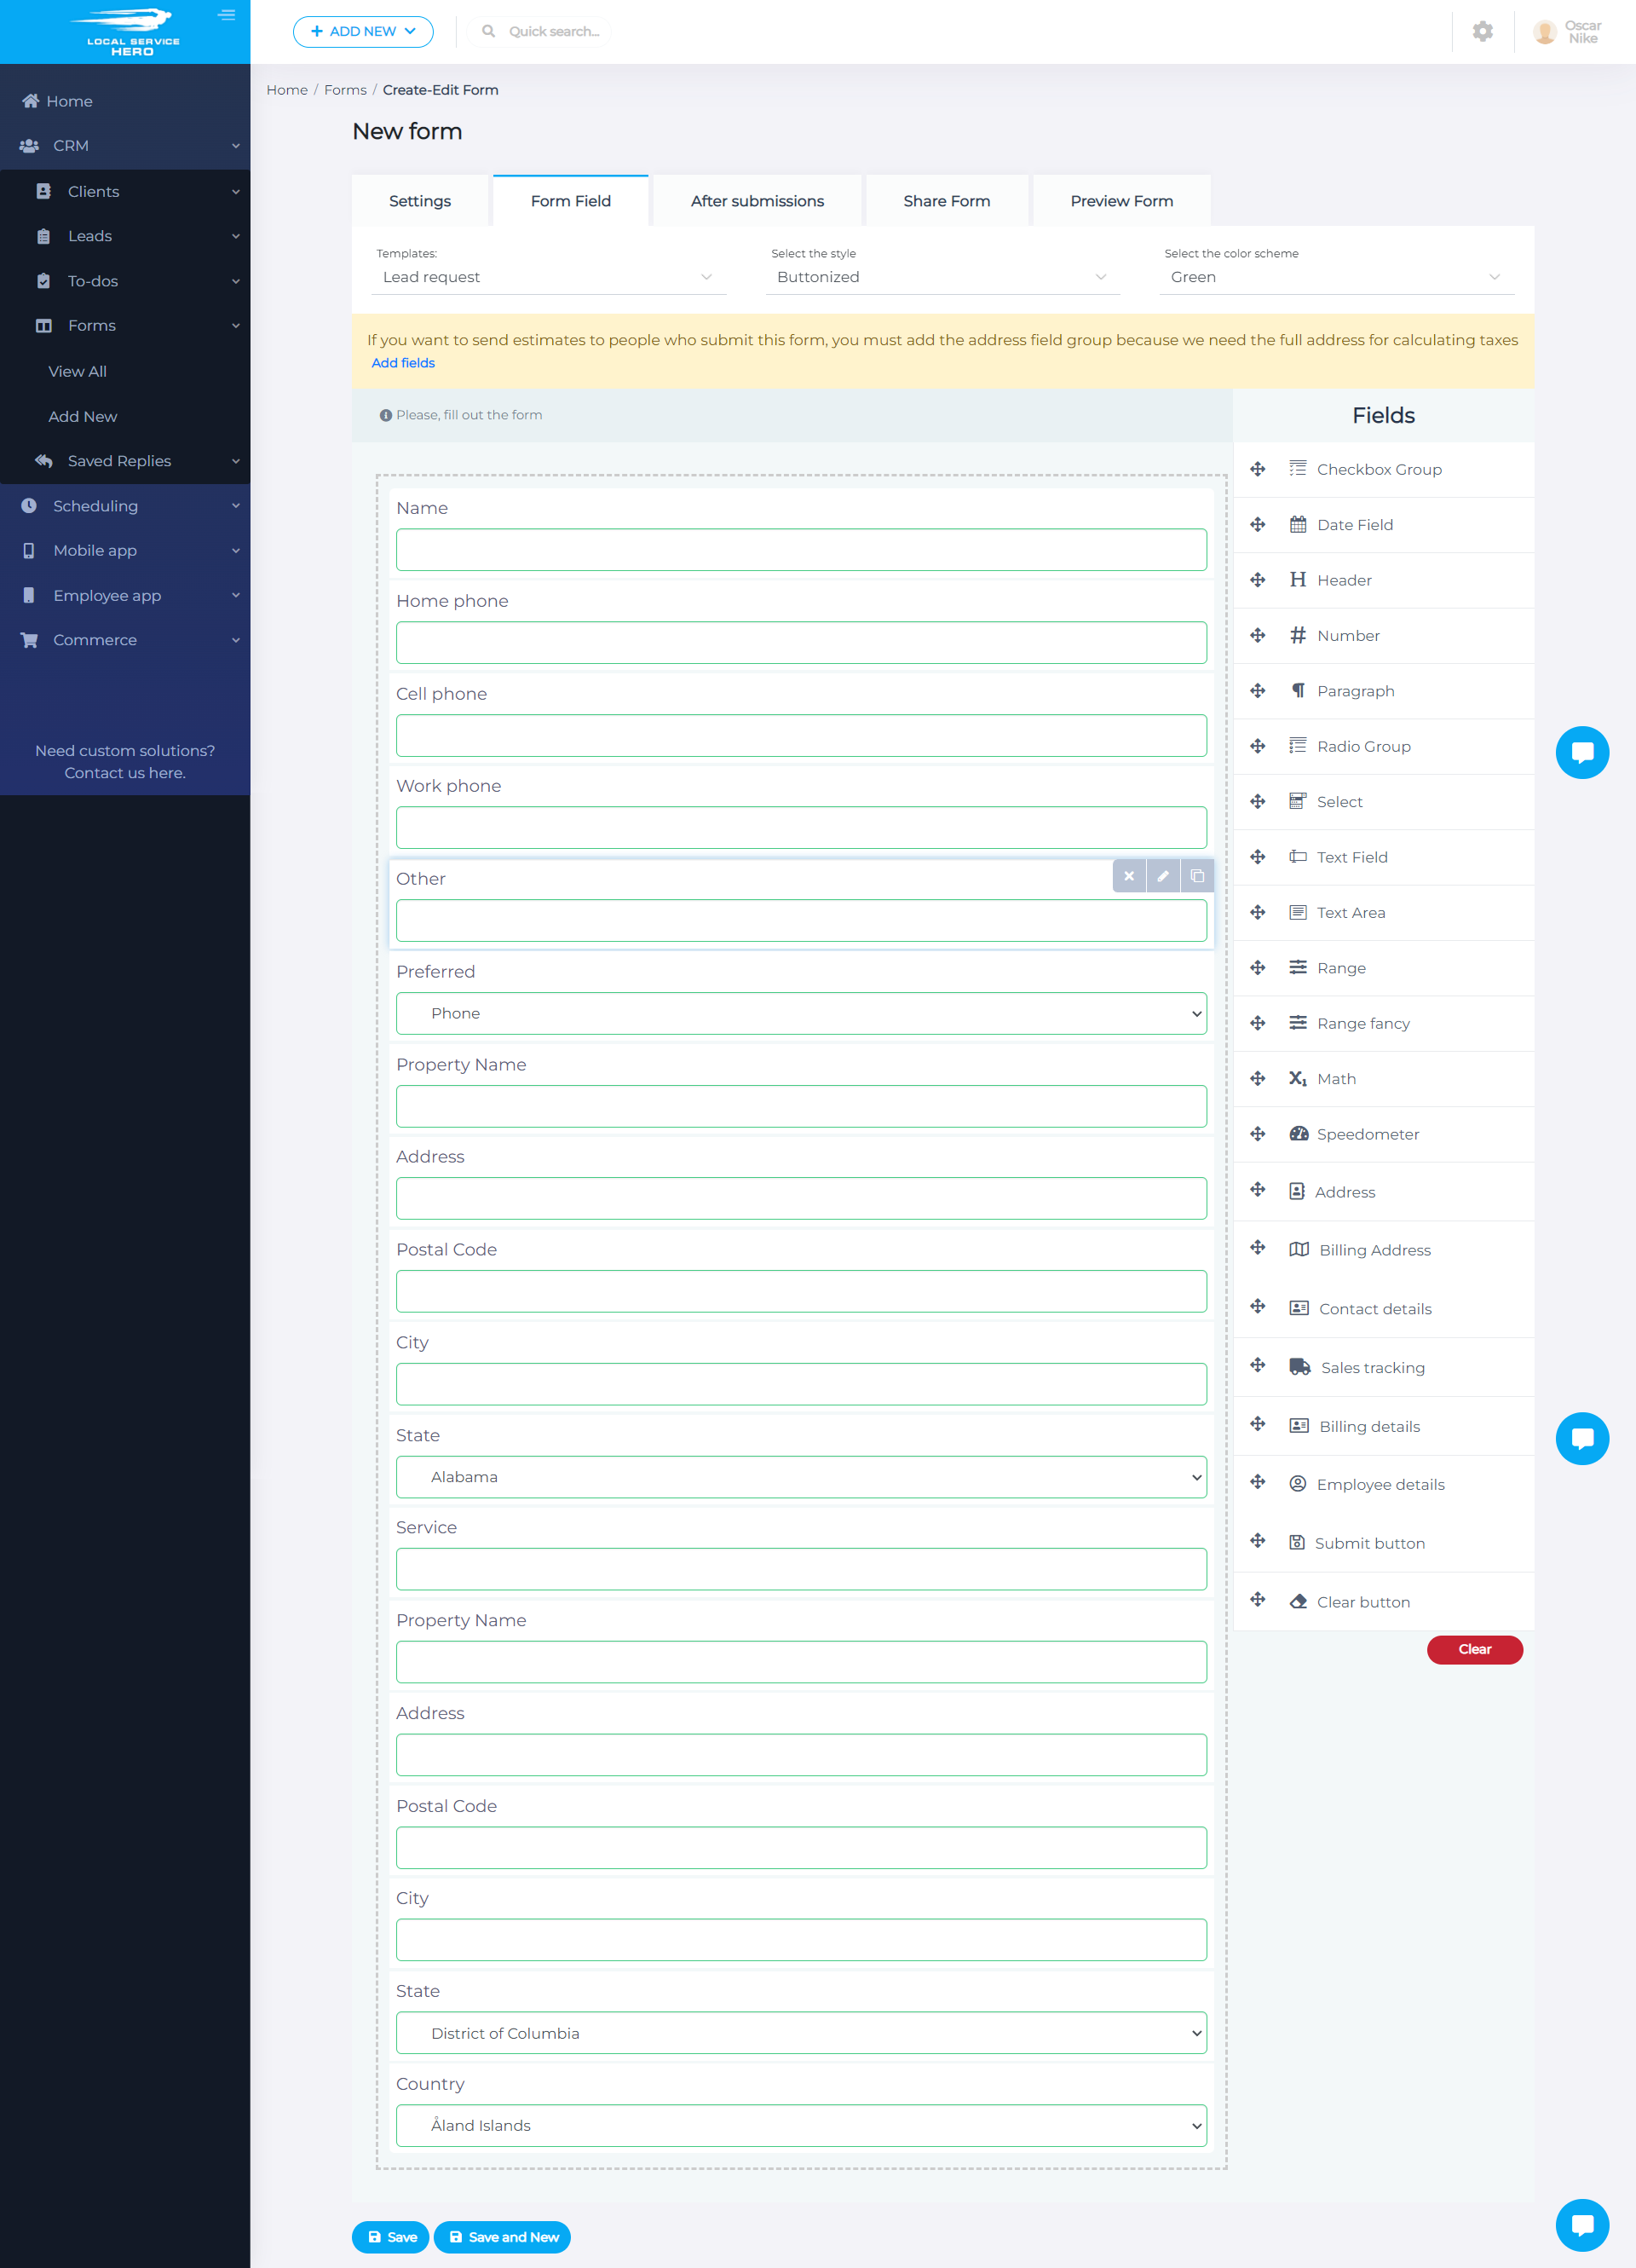
The Form Fields tab allows you to add all the fields that you will use to collect information from people who fill out the form.
The fields will be automatically added depending on the form Category you have selected under Settings. However, you can customize it by adding or removing fields.
You can also use previous forms as templates and select them by using the Templates dropdown.
The Select the style dropdown allows you to select how your form fields will look. Also, you can Select the color scheme.
You can add any of the following field types:
- Checkbox group
- Date field
- Header
- Number
- Paragraph
- Radio group
- Select
- Text field
- Text area
- Range
- Range fancy
- Math
- Speedometer
- Address
- Billing address
- Contact details
- Sales tracking
- Billing details
- Employee details
- Submit button
- Clear button
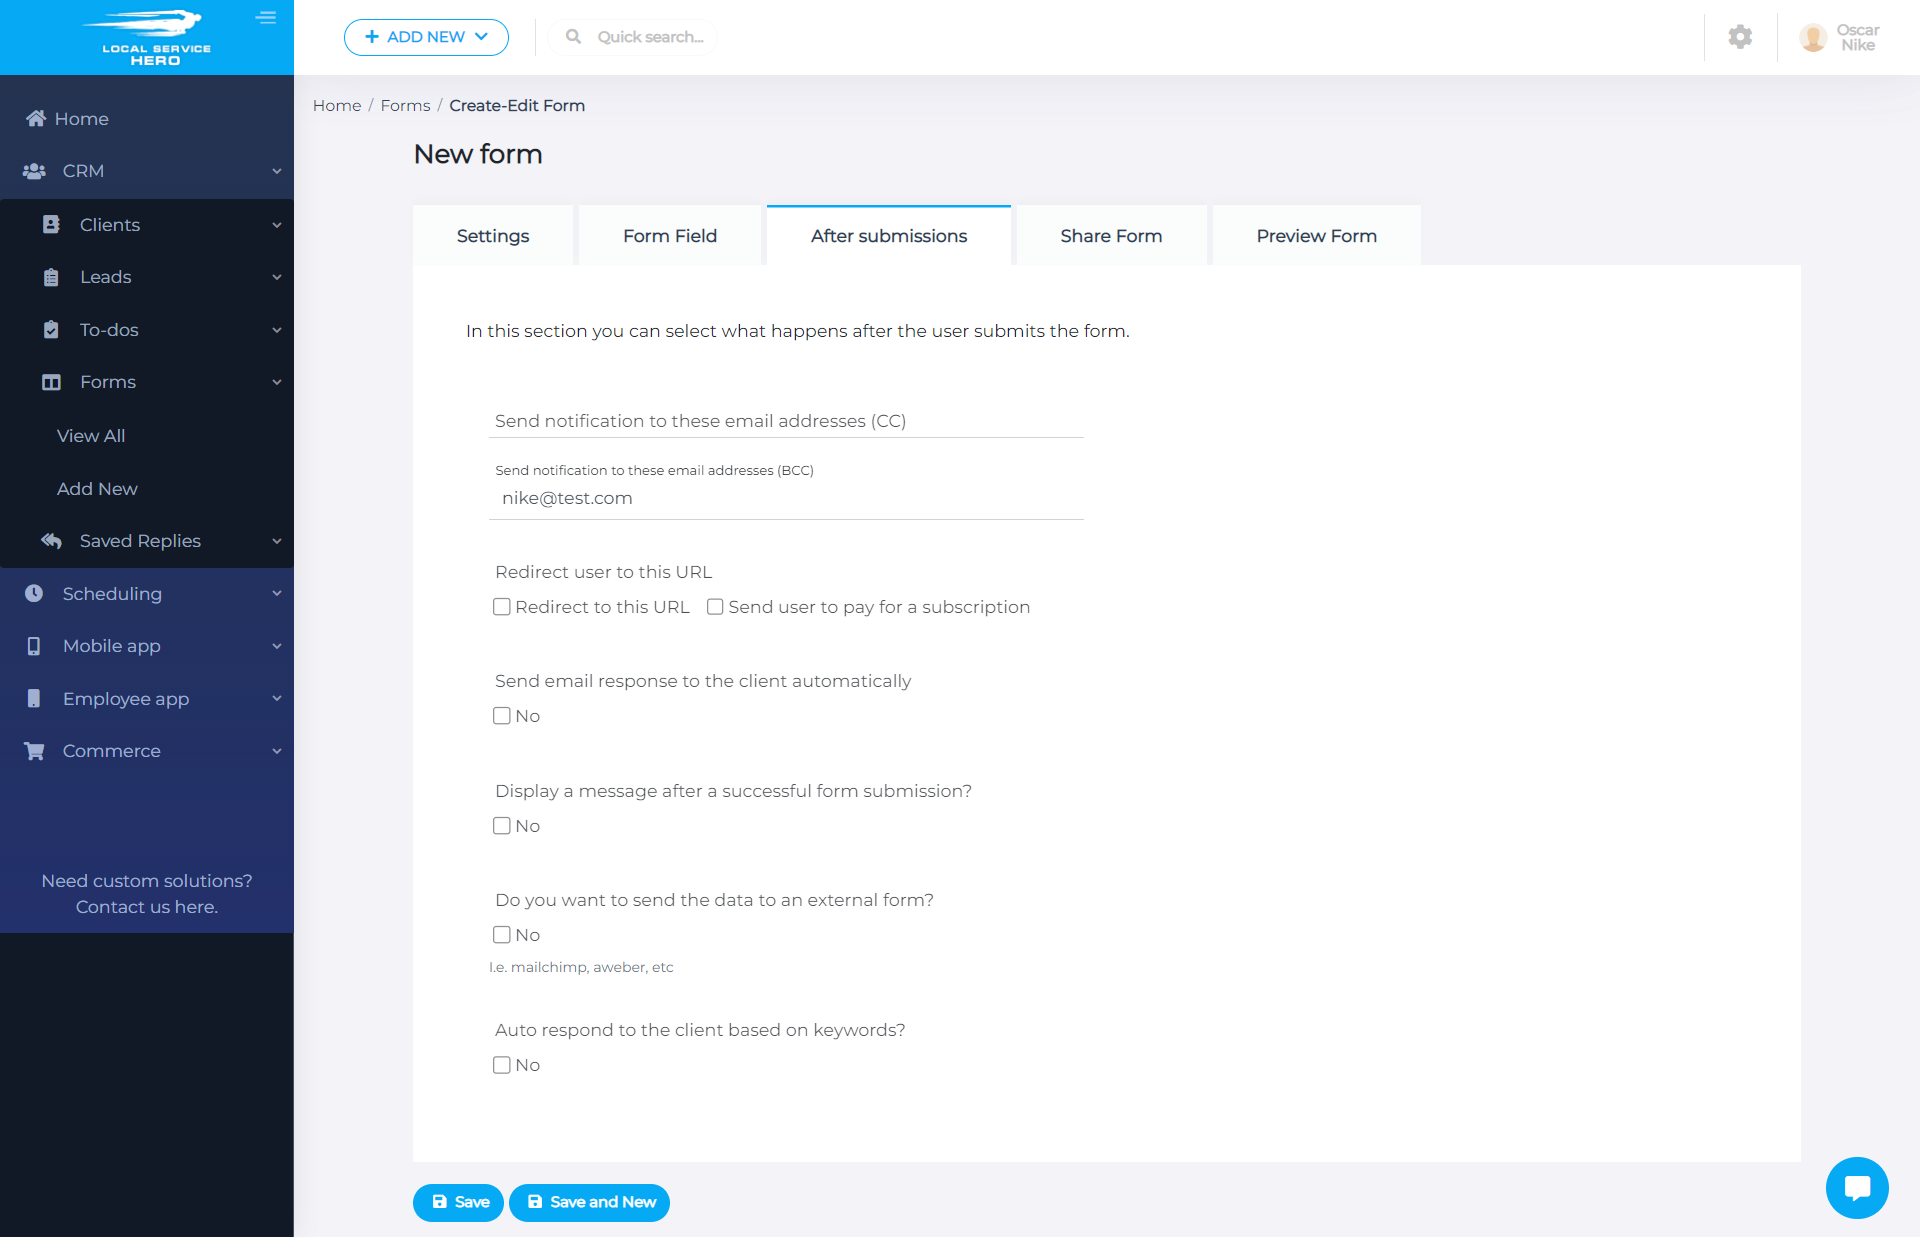
4- Select the after submissions settings
You can select what happens once users hit the Submit button.
For example, you can:
- Send notification to these email adresses (CC)
- Redirect users to a specific URL
- Send users to pay for a service
- Send email response to the client automatically
- Display a message after a successful form submission
- Send the data for an external form
- Auto respond to the client based on keywords
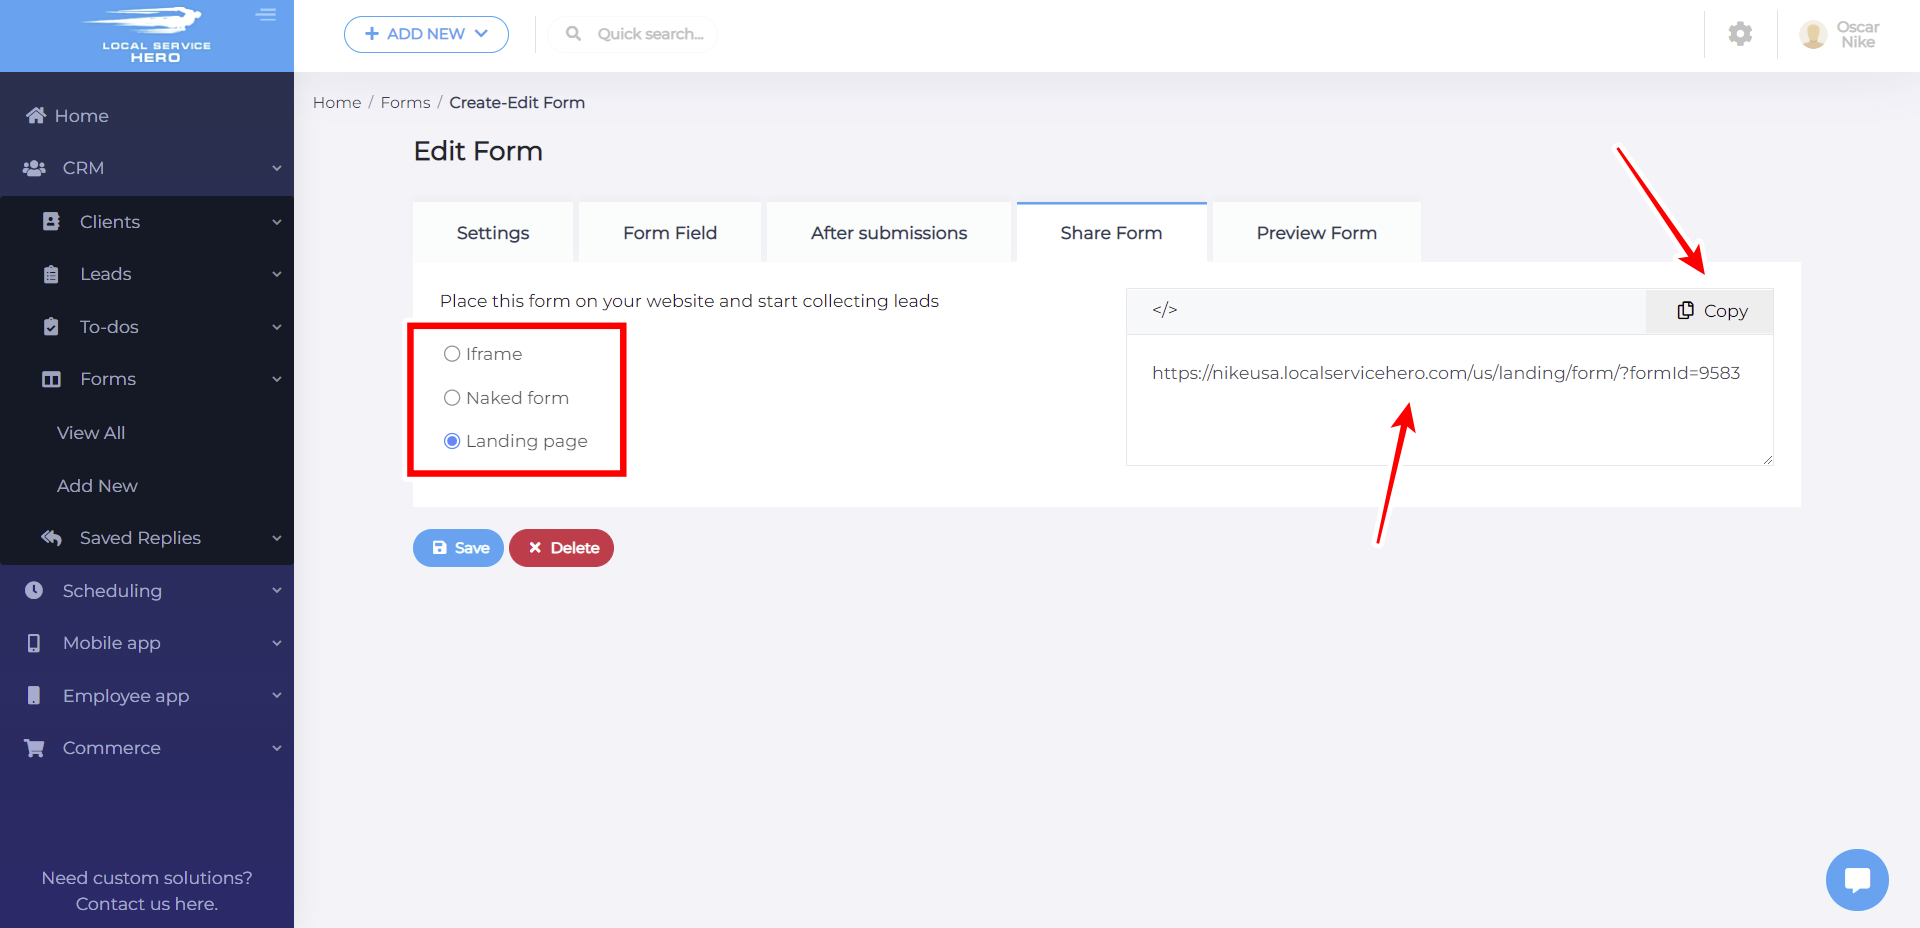
4- Share the form on a website, emails, or social media
If you’re including this form on a post or a page on a website, you need to use the Iframe share format.
If you’re sharing this by email or social media, you can also select the Landing Page option to share a link that will show the form on a page.
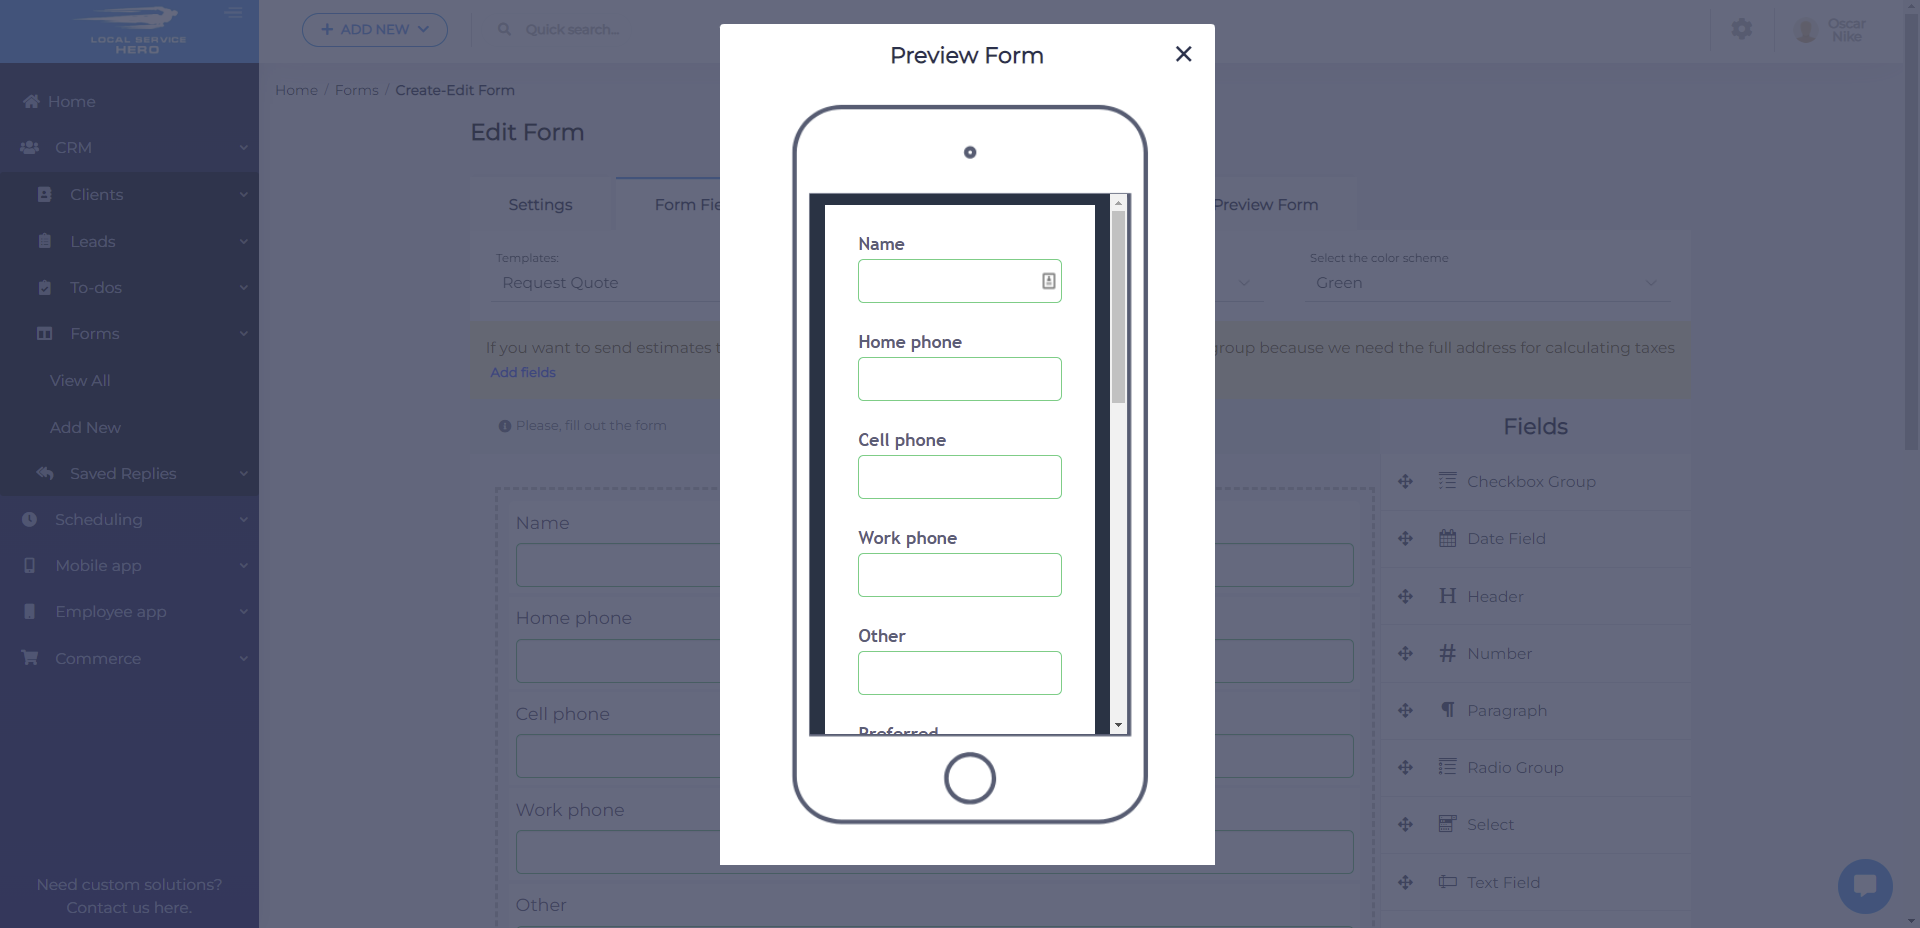
6- Preview the form in Local Service Hero
Before sharing the form, it can be really useful to preview it in Local Service Hero. You can do this in the Preview Form tab, where you’ll have a preview of the form in a smartphone.
You can follow these steps to share your Local Service Hero forms on a website, social media, or email marketing campaigns.


