Let’s learn how to create administrator accounts in Local Service Hero.
In Local Service Hero, Administrators have access to the control panel and have permissions to perform all actions like:
- Manage clients
- Manage leads
- Manage employees
- Edit billing information
- Create mobile app pages
- Manage the mobile app for employees
- Invoice services or send payment reminders
- Add jobs to the calendar
- Manage the service calendar
- Manage products
- And many other actions
This role is for business managers or administrators, while the employee accounts are for field workers.
Therefore, in this tutorial, we’ll show you how to create new administrator accounts.
1- Open your “Admins” page
To open your “Admins” page, you need to go to Settings > Admins.
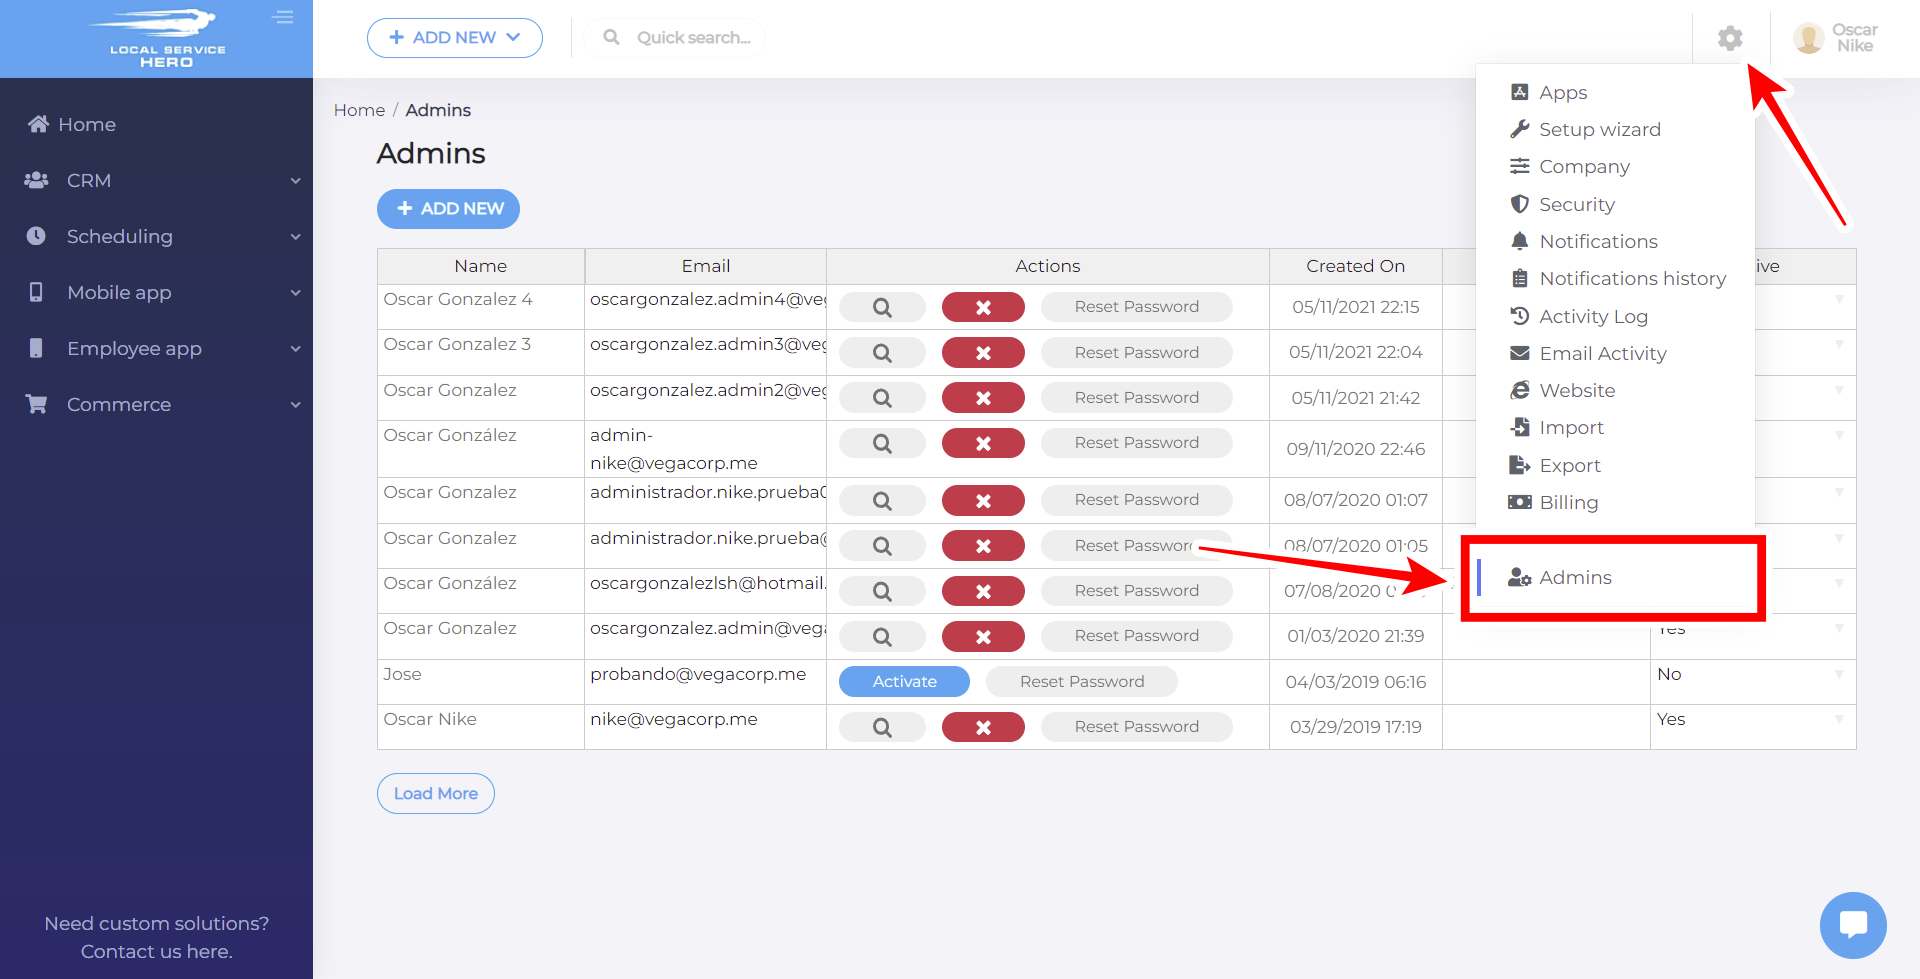
The “Admins” page will show you a spreadsheet containing all your Administrator accounts.
2- Add a new Admin account in Local Service Hero
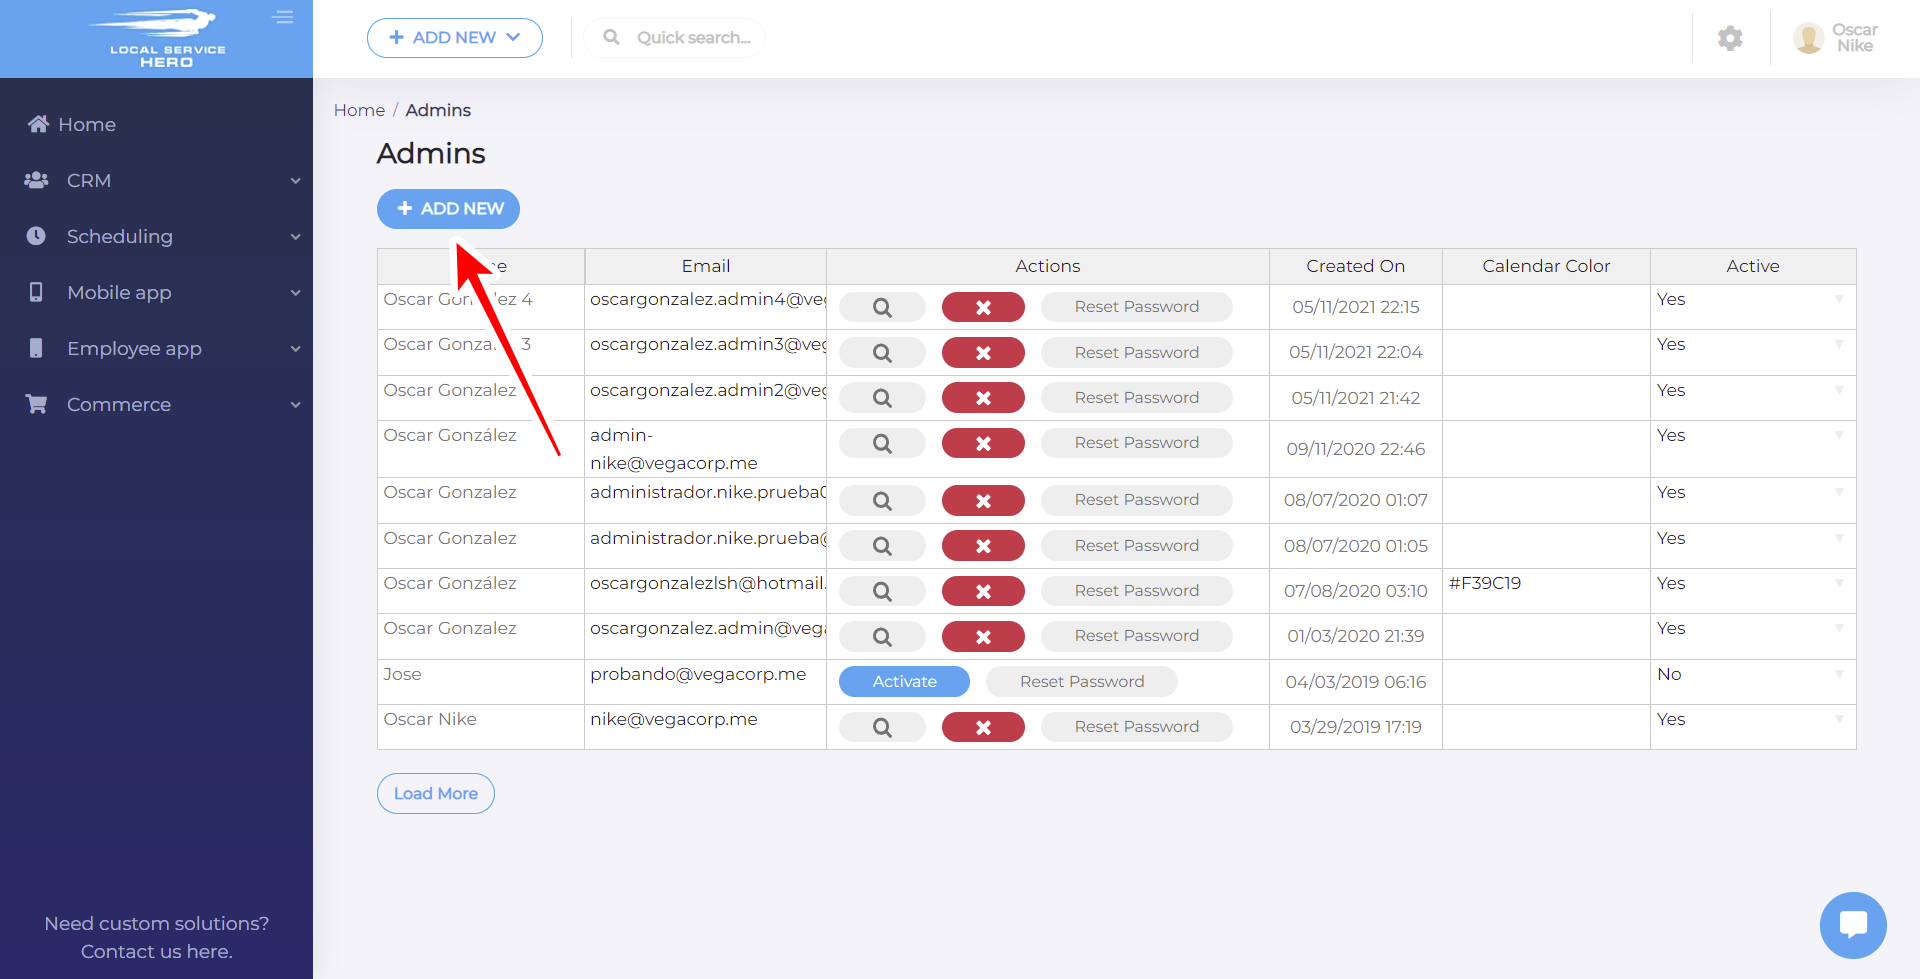
To add a new admin account in Local Service Hero, you need to click on Add New above the admins spreadsheet.
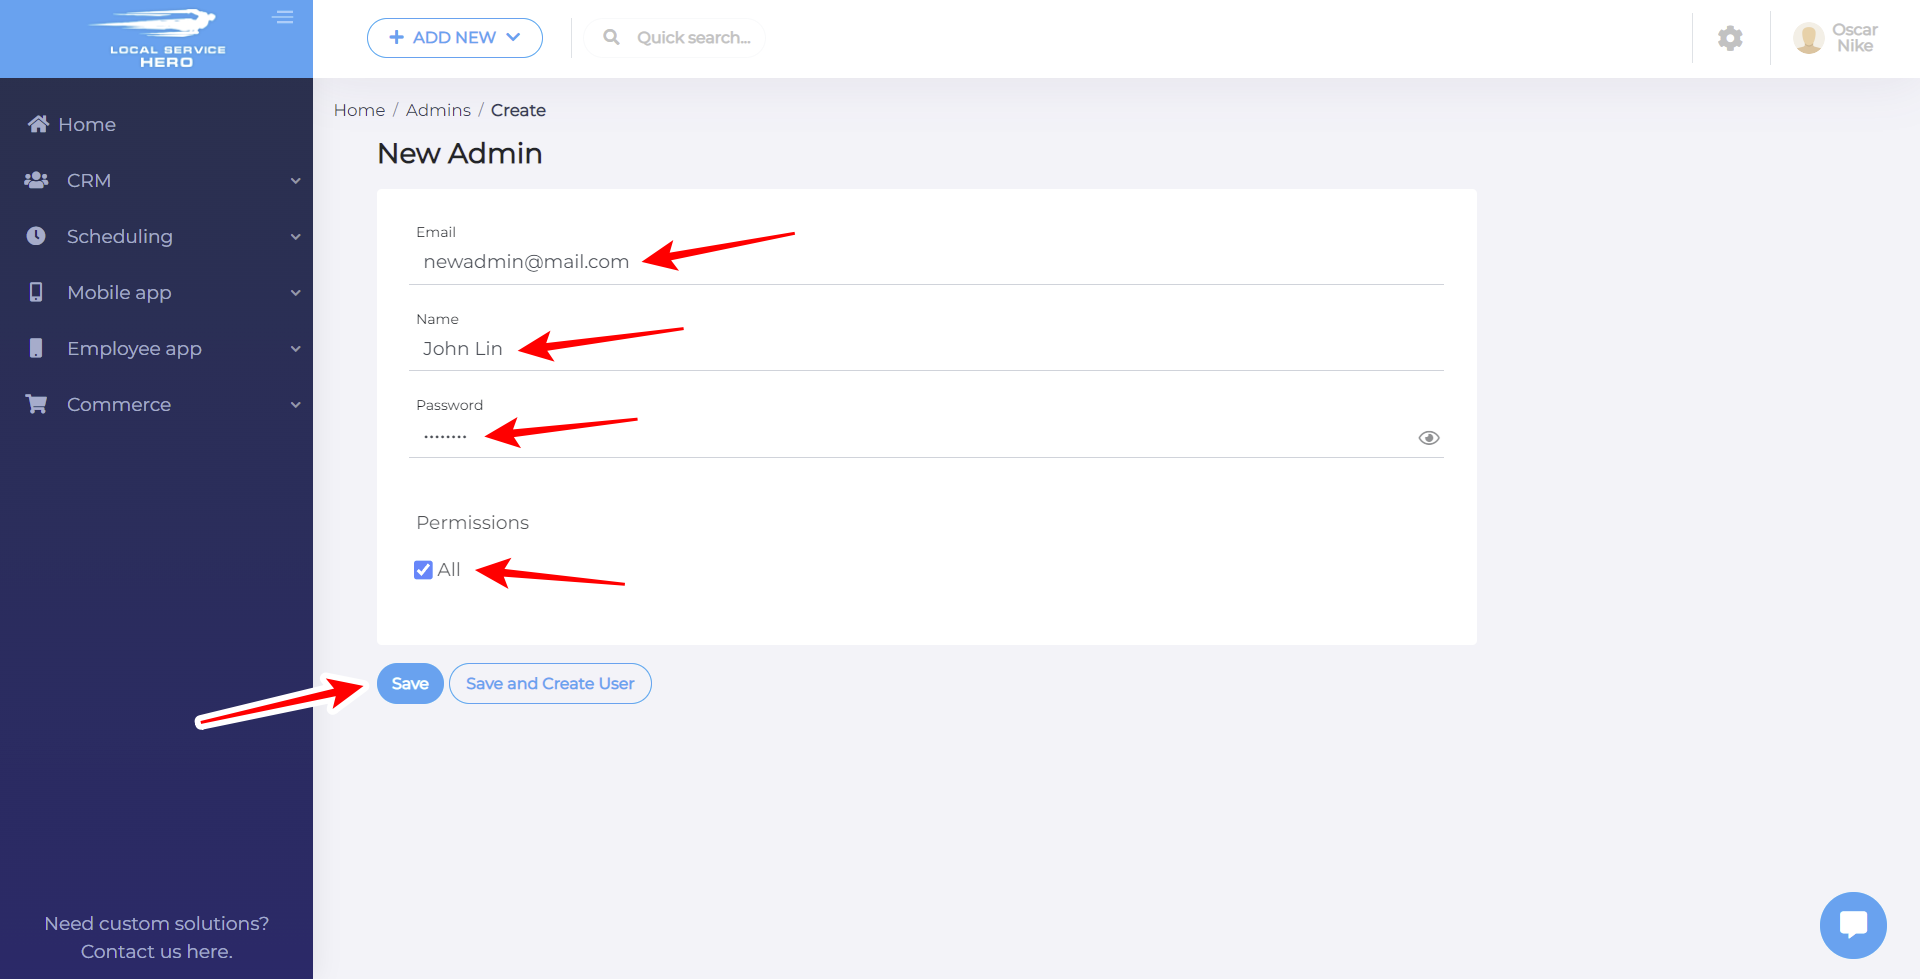
Now you need to select the new admin Email, Name, and Password.
You need to also select the permissions you’ll grant to the new administrator. In this case, we’ll tick All the permissions.
Finally, you need to click on Save. You also have the option to create other admins after this one; just click on Save and Create Admin.
After following these simple steps, your new admin account will be added to Local Service Hero and will appear on the Admins page.

