

Let’s learn how to create new to-dos in Local Service Hero. A to-do is a task that your team has to carry out, whether it’s giving a service, calling contacts, etc.
Once you log in to your Local Service Hero account, you need to head to CRM > To-dos > Add New. You’ll see the Add New To-do form.
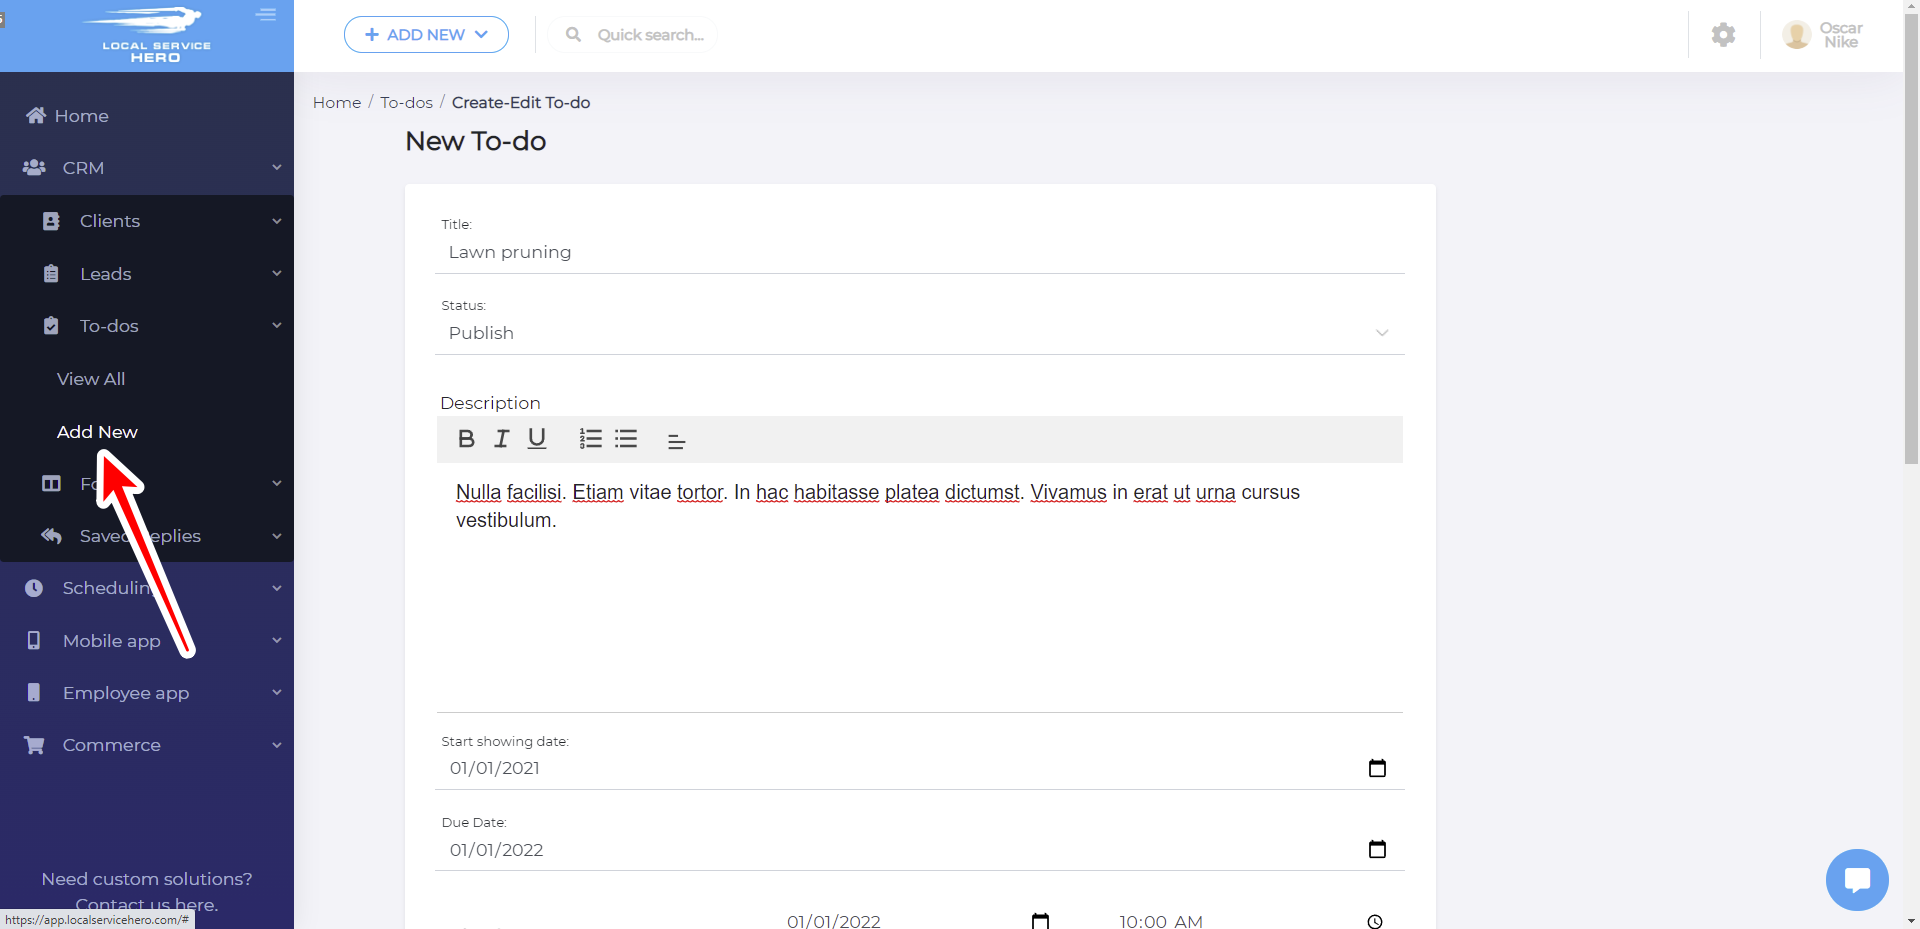
These are the fields the New To-do form contains:
- Title: Add the to-do’s title here.
- Status: You can publish it or leave it as a draft.
- Description: Here you can add a description of the to-do.
- Start showing date: This is the date on which the to-do task will start being shown to the assigned person.
- Due Date: This is the date the to-do must be carried out.
- Calendar Start Date:
- Calendar End Date:
- Budgeted man hours: This is the time (hours) the task will take to be carried out.
- Priority: You can select between Low, Normal, and Urgent.
- Type: You have these options here:
- Account issue
- Accounting
- Estimate
- Marketing
- Other
- Schedule Service
- Terminate Service
- Select client: Here you select the client who needs the to-do carried out.
- Select lead: Maybe the to-do is to schedule a service to a lead, so you can select the lead here.
- Once you’re done, hit Save to create the new to-do.

With these simple steps, you’ll be able to add new to-dos in Local Service Hero.


